- /
- /
- /
How to Create Teams Channels for Group Work
If you want students to do the group work in the Teams class , you can use the following instructions to set up each group in Teams channels.
Note: If you want to have the group work in the Teams Live meeting, you can use this tutorial. How to create Breakout Rooms in Microsoft Teams
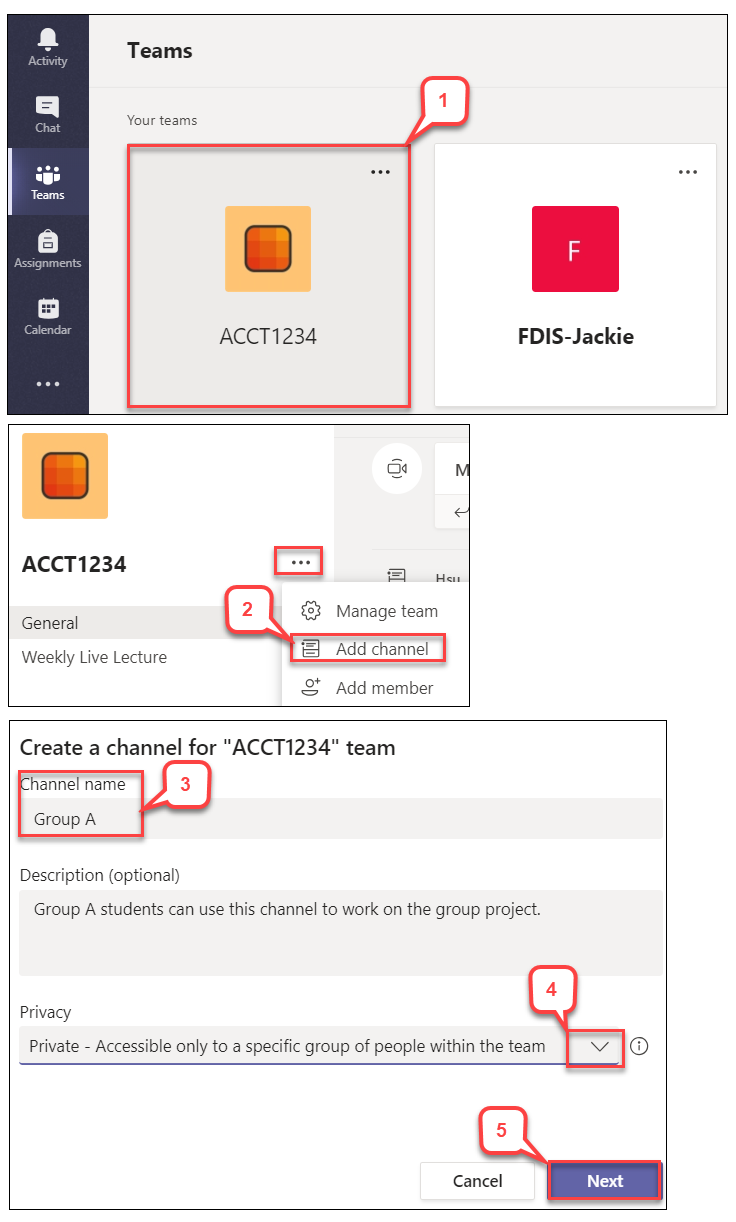
- Select your Team class.
- Click … (more options) next to the Team name and select Add channel.
- Enter a group name and description (optional.)
- In the “Privacy” section, click the down arrow and select Private – Accessible only to a specific group of people within the team.
Note: In the private channel, group members can’t do the meeting recording. It is best to use the private channel for the groups when you want the group members to stay in the whole semester. - Click Next.
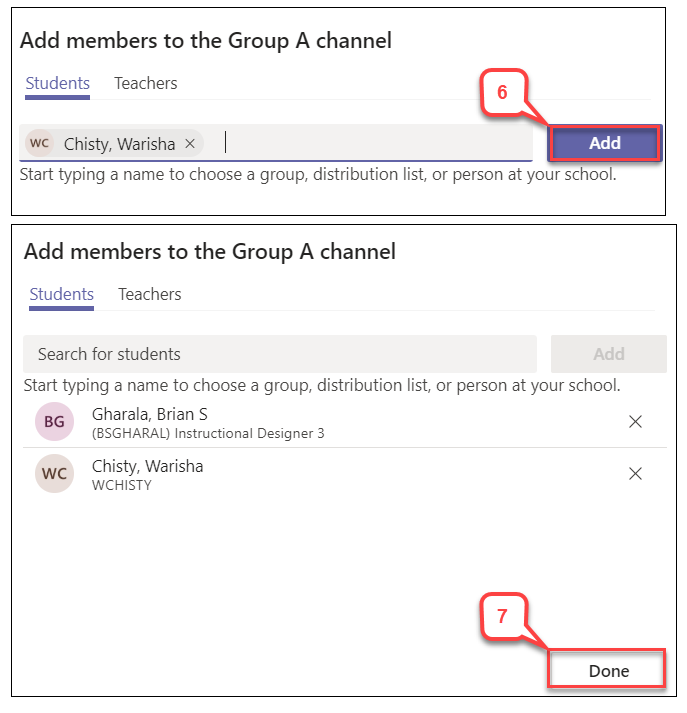
- In the “Students” tab, search students’ names, and click Add.
Note: Students must be in your Team members. - After adding all students for this group, click Done.
- A private channel for this group is created with a lock icon.
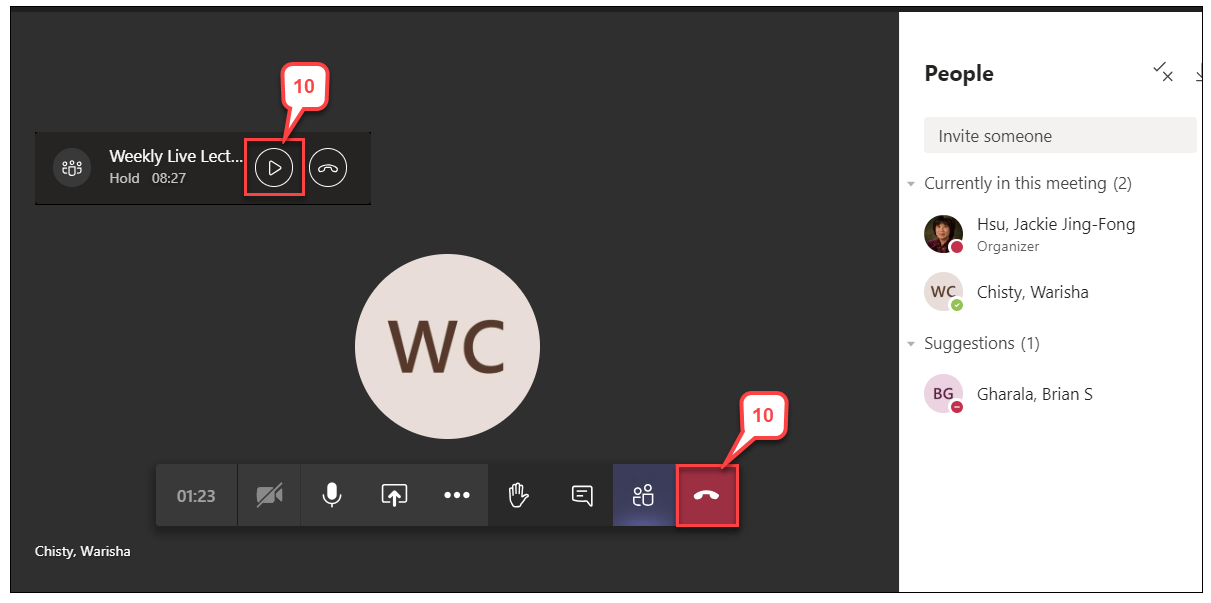
- To join the group breakout room while you and students are in the lecture meeting, click the group channel, and select the Video icon (Meet now.) Do not end the lecture meeting. Teams will put the lecture meeting automatically to hold.
Note: Students also use the same step to join their group meeting. - To end the group meeting, click the hangup icon. To resume the lecture meeting by clicking the right arrow icon.
Note: The instructor can jump different group breakout rooms by clicking the right arrow icon and do not click the hangup icon.