- /
- /
- /
How to Produce or Present a Teams Live Event
Read First. If the number of your students is less than 300, we strongly recommend you to use Teams live meeting. How to Attend and Record a Live TEAMS Meeting
In Teams live event, you, the event producer, can broadcast a Teams meeting, bringing remote presenters and screen sharing into the event. The producer have the following capabilities. If you are the only presenter in this event, you can produce/present in this event.
- Select video feeds from other presenters and send them to the event.
- Chat with other producers and presenters.
- Start and end the live event.
Warning: Once you stop the live event, you can’t restart it! - View the live attendee count
- Share their screens (desktop or a window) into the event
- Mute all other producers and presenters
- Moderate the Q&A, if configured for the event. However, students only have the “Ask a question” option and can’t respond the question.
- Download recording
Note: No automatically archive recording in Microsoft Stream - Download attendee report
Important Notes:
- You need to have a webcam for a live event.
- To produce a live event, you need to join the event on the desktop app.
- Producers can’t blur their backgrounds.
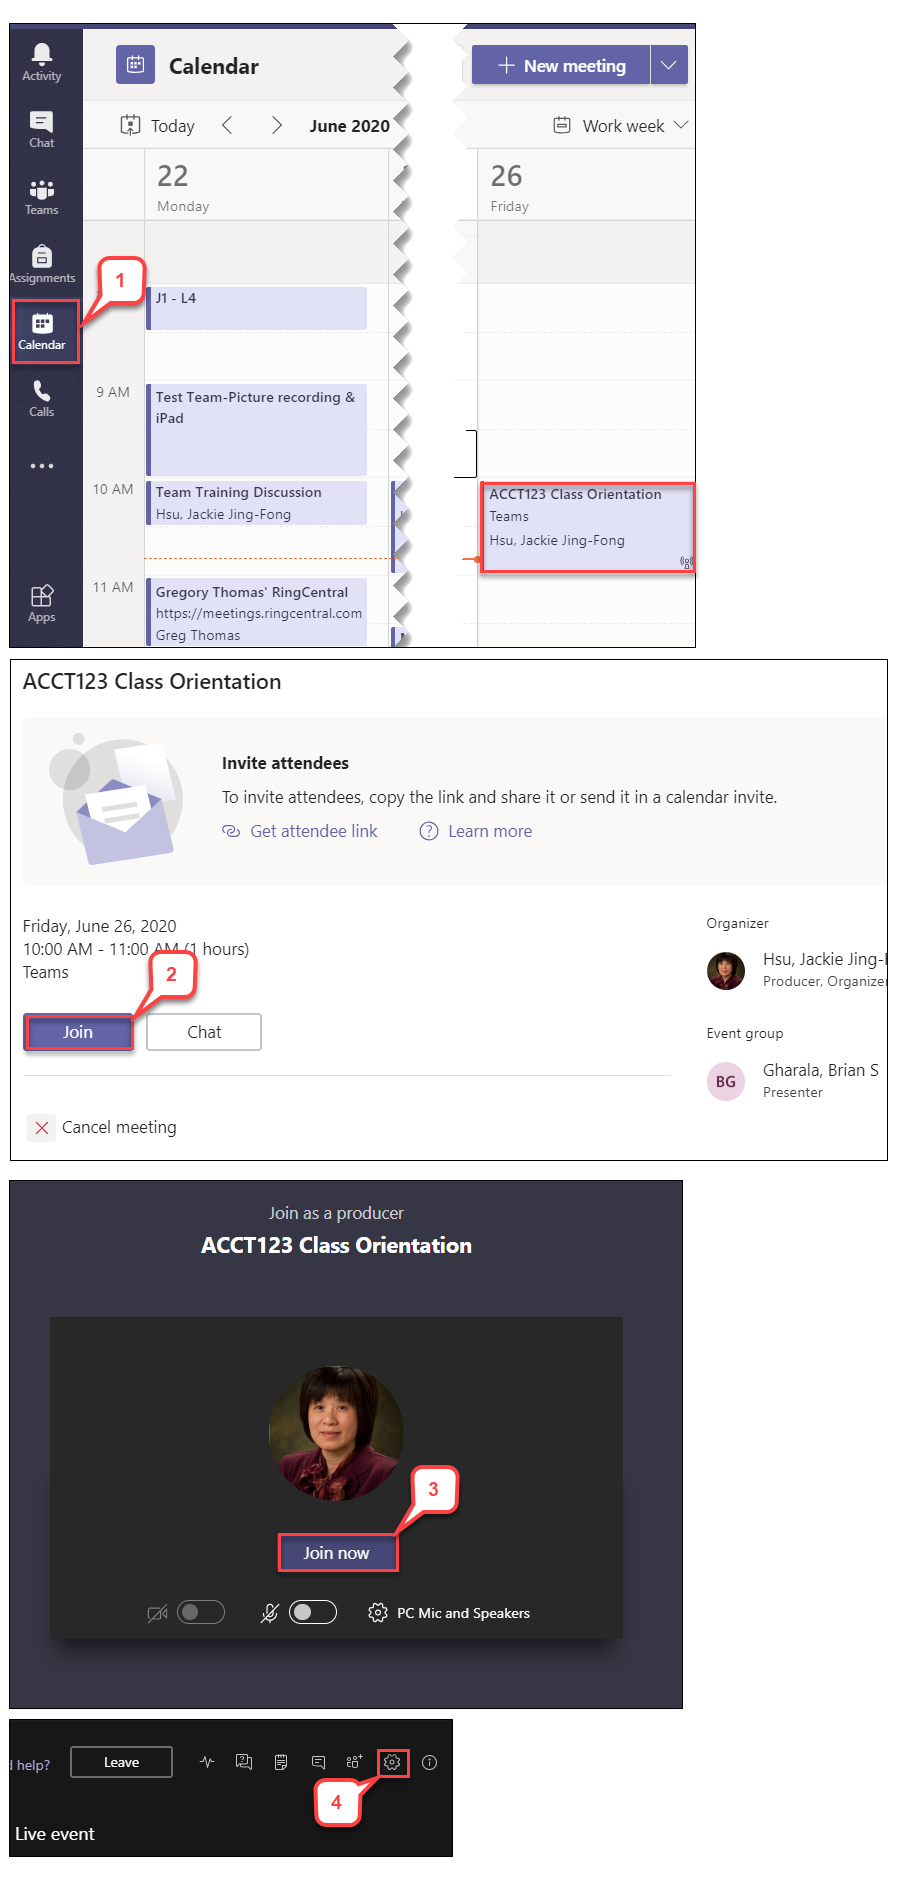
- In Teams, select Calendar. Then select the scheduled live event.
- Select Join.
- Select Join now.
- Select Show settings panel.
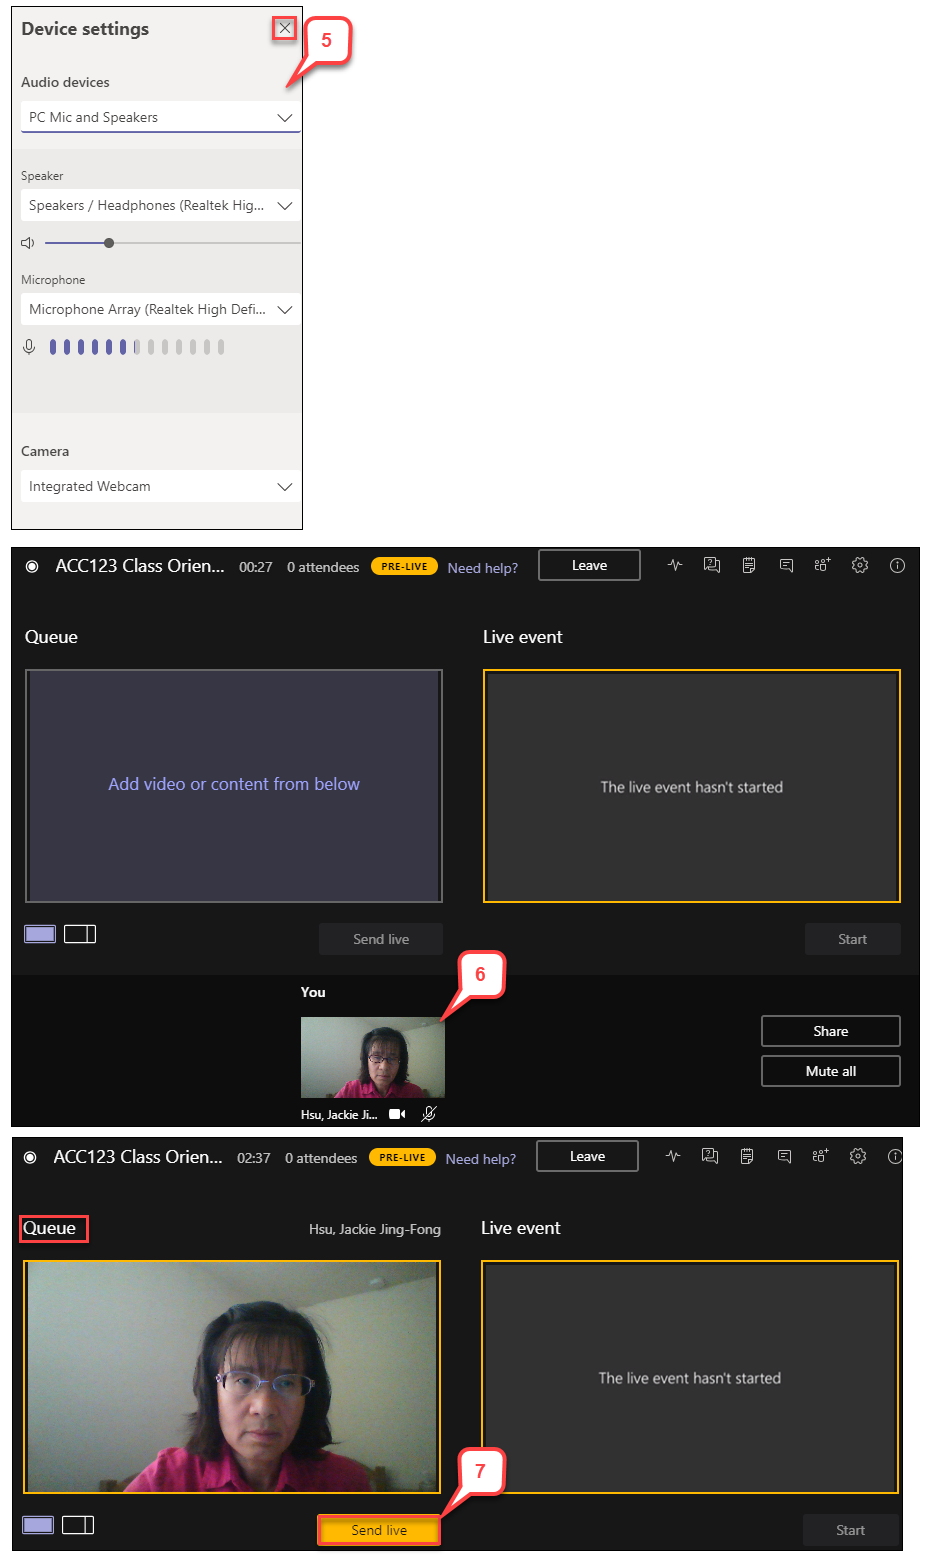
- In the “Device settings” section, select the proper audio devices, speaker, and microphone. Then, click X to close the window.
- In the “PRE-LIVE,” select your camera feed at the bottom of the screen.
- Preview it in the “Queue” screen (on the left). Click Send live to send the feed from preview to the live event. (on the right).
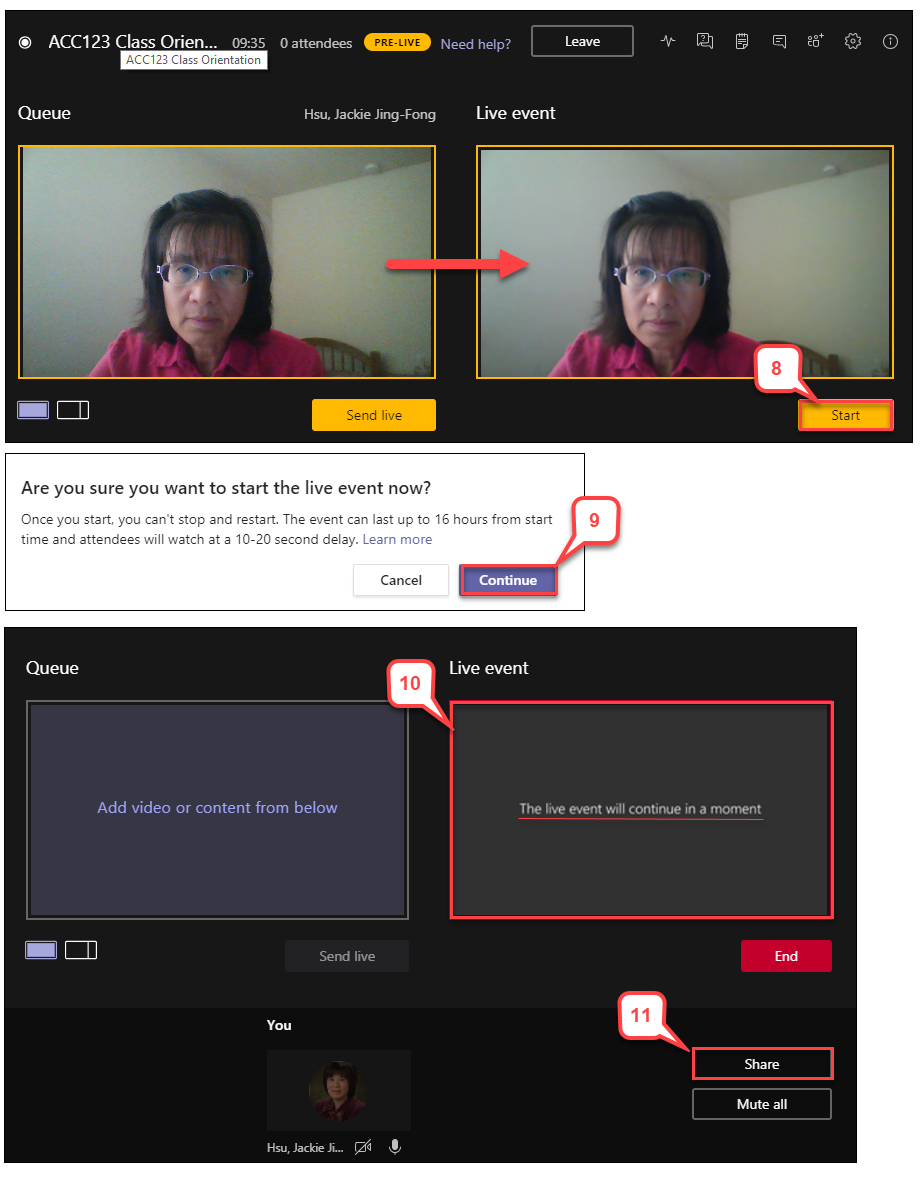
- Click Start when you are ready to start the live event.
Note: The live event will be recorded automatically. But, it is not saved in Microsoft Stream.
- Click Continue when starting live event message shown.
- During the live event, if you stop sharing video (by turning off your camera, for example), everyone will see Live event will continue in a moment.
- To share your desktop or a window, select Share.
Tip: If you are the only producer/presenter in the event, you might consider to use multiple monitors or share specific windows (instead of your whole desktop). Otherwise, everyone will see Teams (and your selections) when you make a change. With multiple monitors, you can queue content in Teams on one screen and have the shared content on the other.
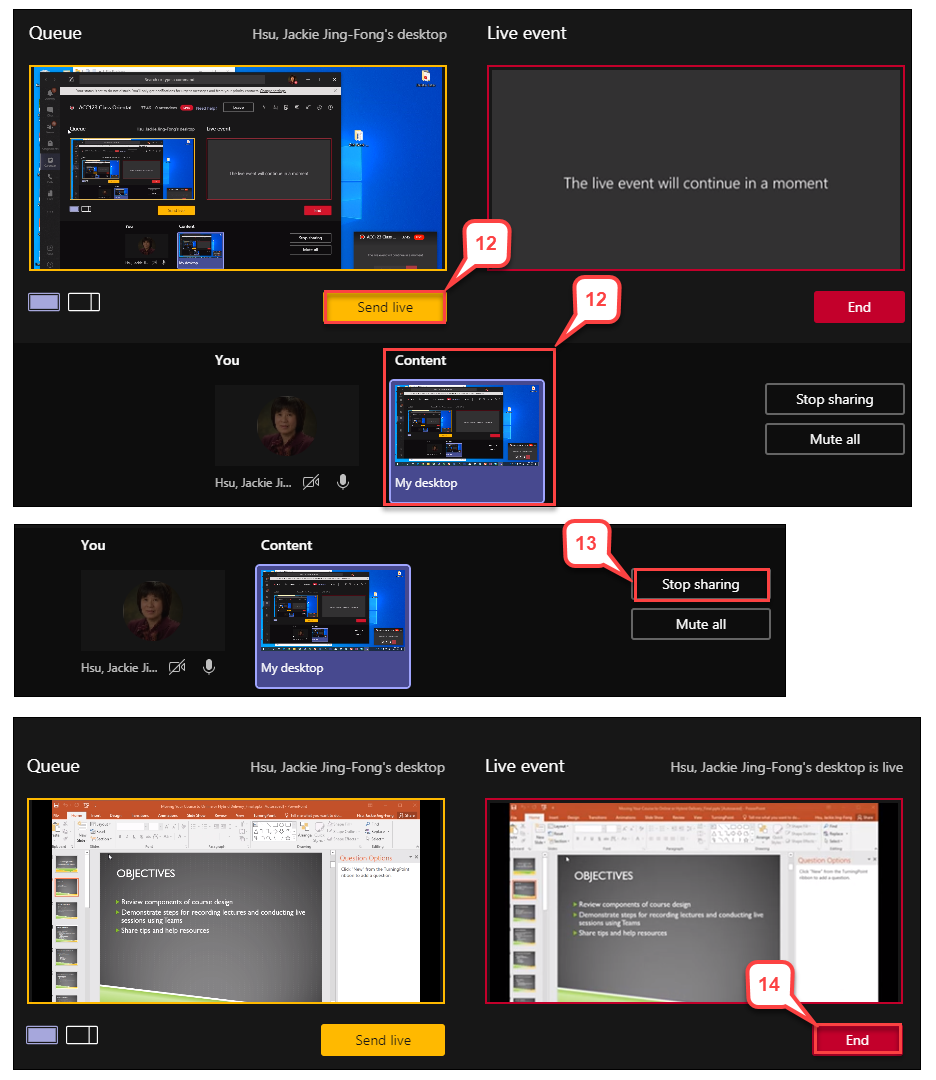
- To share the desktop, select Share > Desktop > Content > Send live.
Note: To share a window, select Share and select one of the open windows from the Windows section in the source tray. Once the window is shared, switch over to the producer UI, select Content and then Send live. - To stop sharing the desktop or window, select Stop sharing in the call monitor window.
- To end the event, select End.
Note: Once the live event ends, it can’t be restarted.