- /
- /
- /
How to Attend and Record a Live TEAMS Meeting
When the scheduled live Team meeting is up, you can use the following instructions to attend and record the meeting as a video.
Note: The maximum number of students attending a Live Teams meeting is 350. If you have more than 350 students, you can consider to do a Teams live event.
Part I. Attending the meeting
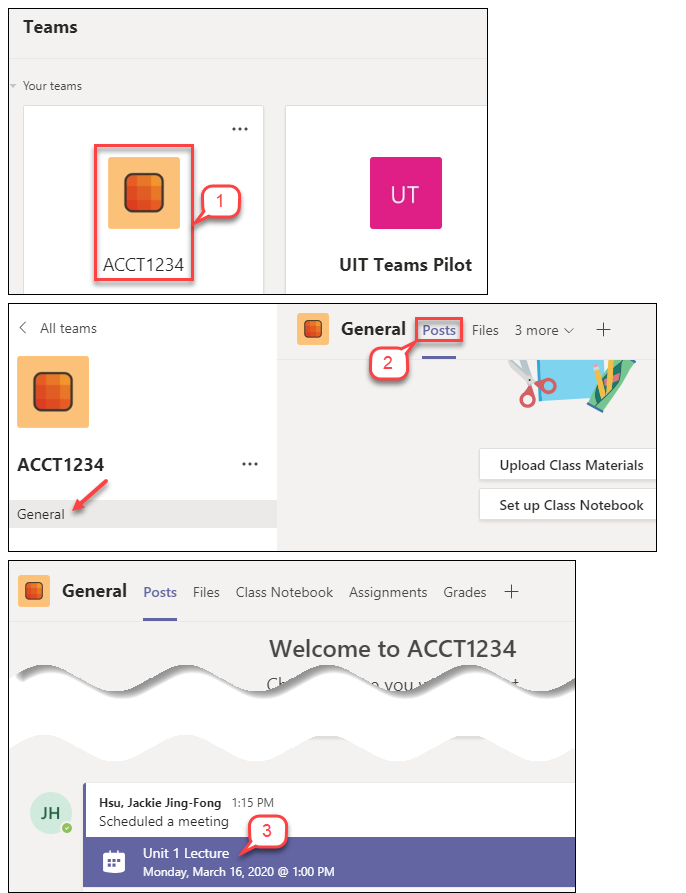
- Select your team class.
- In the class team “General” channel, click Posts tab.
- In the Chat area, click on the scheduled meeting.
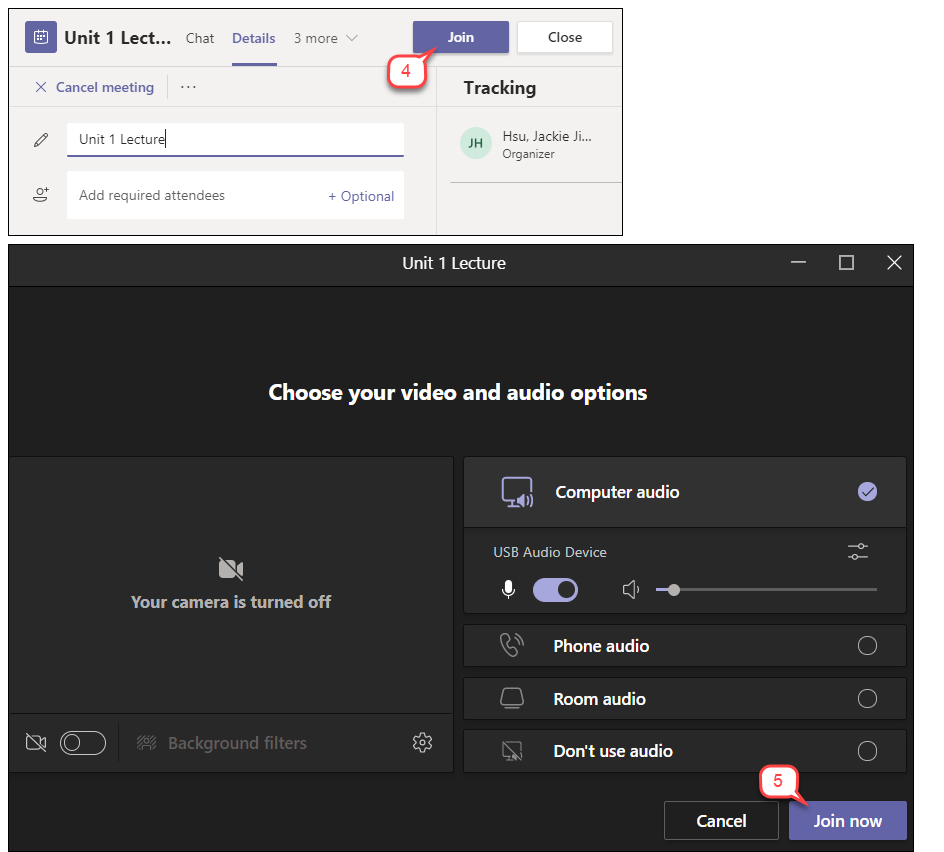
- Click Join.
Note: You can also use the link shared to students to join the meeting. - Click Join now.
Part II. Recording a meeting
If you record the meeting, the recorded video will be saved to Microsoft Stream. Only you will be able to access it. If you want to share it to students in Blackboard, you can get a shareable link in your Microsoft Stream.
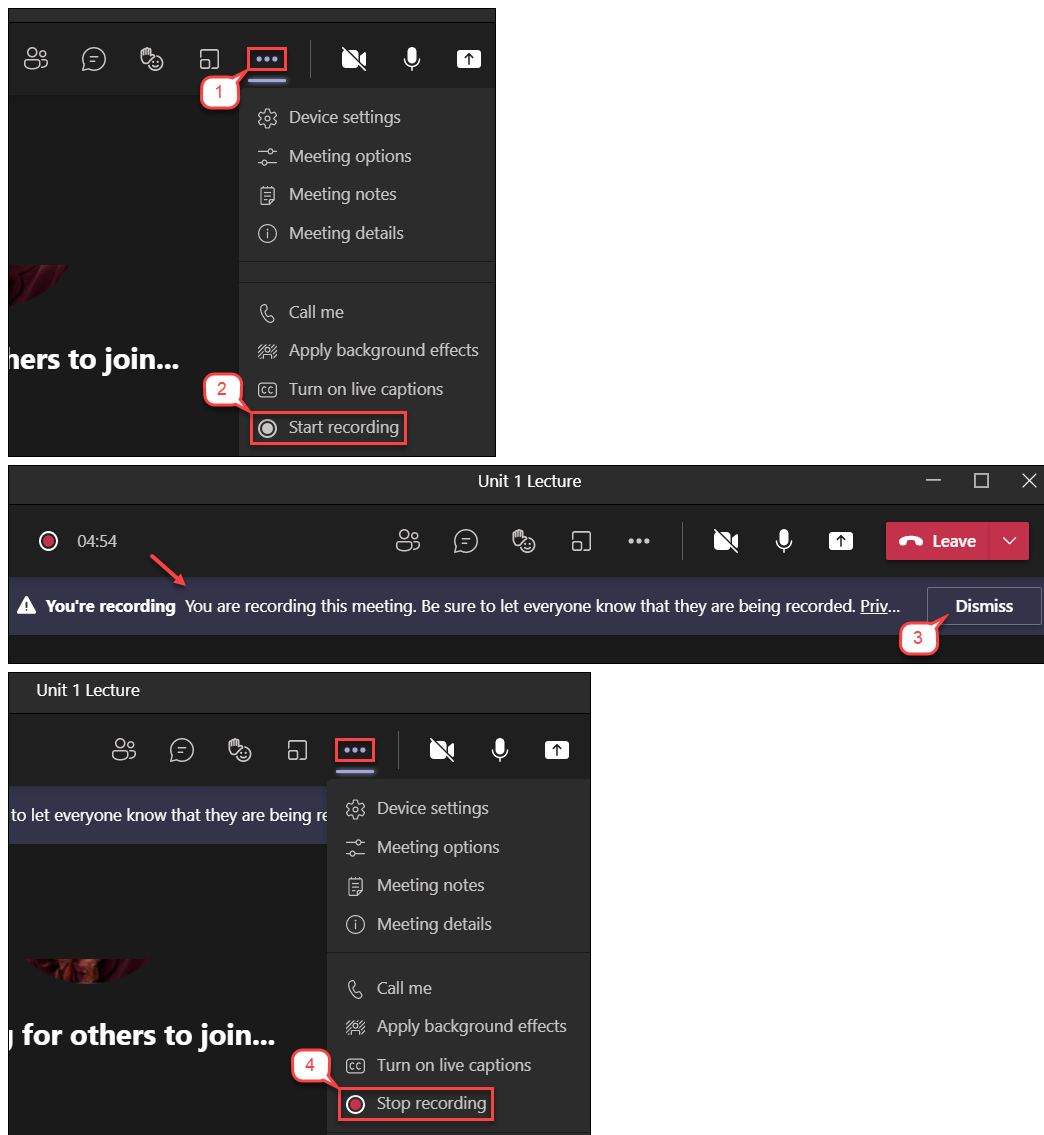
- In the meeting controls at the top, click on … (More Actions.)
- Click Start recording.
- A message “You are recording this meeting. Be sure to … Privacy policy” is shown. Click Dismiss.
- At the end of the meeting, click … (More Actions.) Then, click Stop recording.
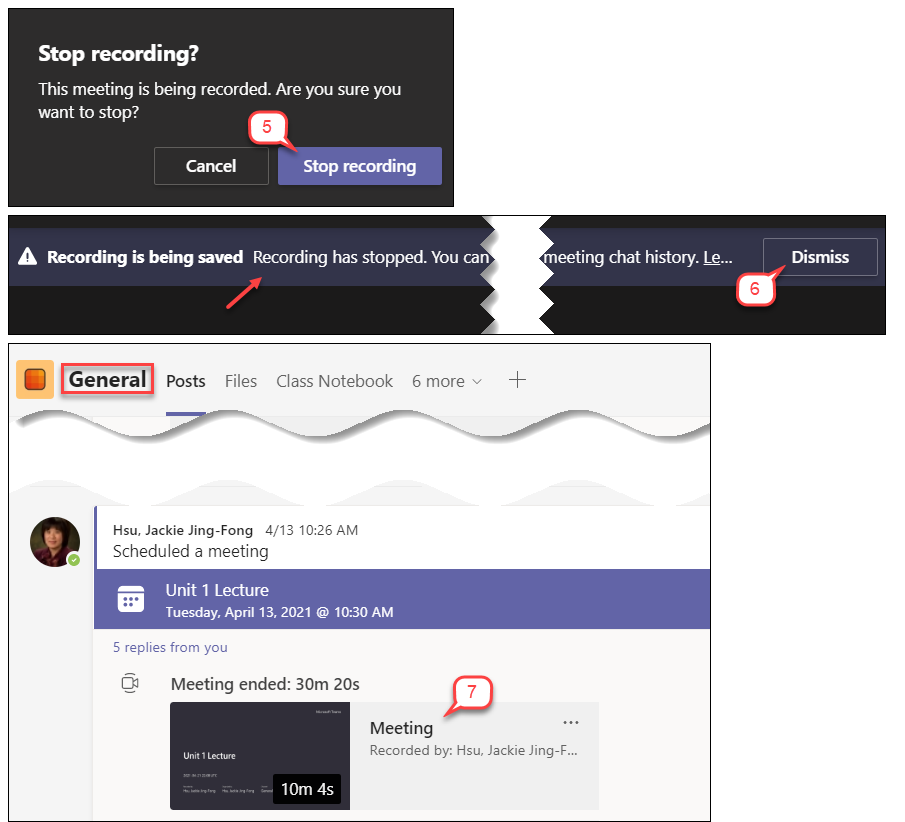
- A confirm “Stop recording” message is shown, select Stop recording.
- A message “Recording has stopped. You can view …. chat history” is shown. Click Dismiss.
- Wait for minutes, the recording video will be published. You can access it in the general chat.
Note: The time of publishing recording video depend on the length of your meeting time. The published video is saved in your Microsoft Stream. - To make your video accessible for your students, you want to add captions into your video. How to Generate Automatic Captions in Microsoft Stream Video