- /
- /
- /
How to Generate Automatic Subtitles/Captions in YouTube Video
You have already uploaded videos into YouTube. Now, you want to add captions into your videos to make your content accessible for your students. YouTube can use speech recognition technology to automatically create captions for your videos.
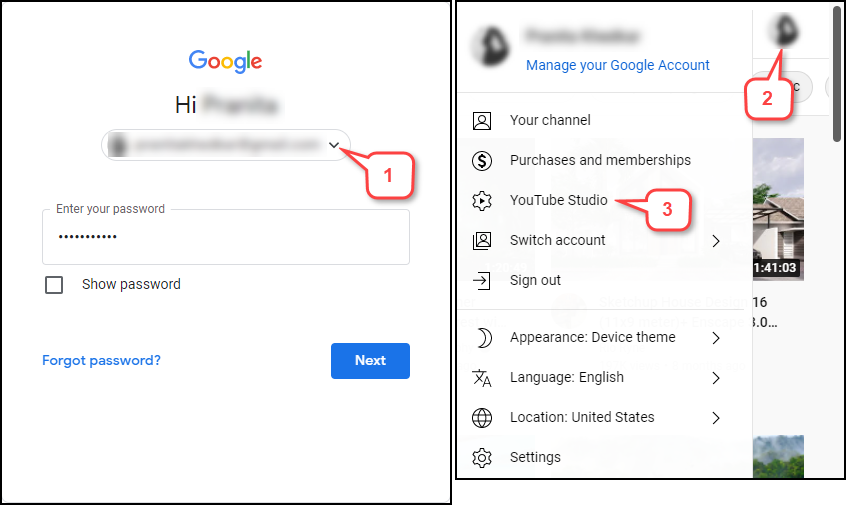
- Log into your YouTube account.
Note: You can log into with your Gmail account.
- Click your account picture in the top right corner.
- Select Youtube Studio.
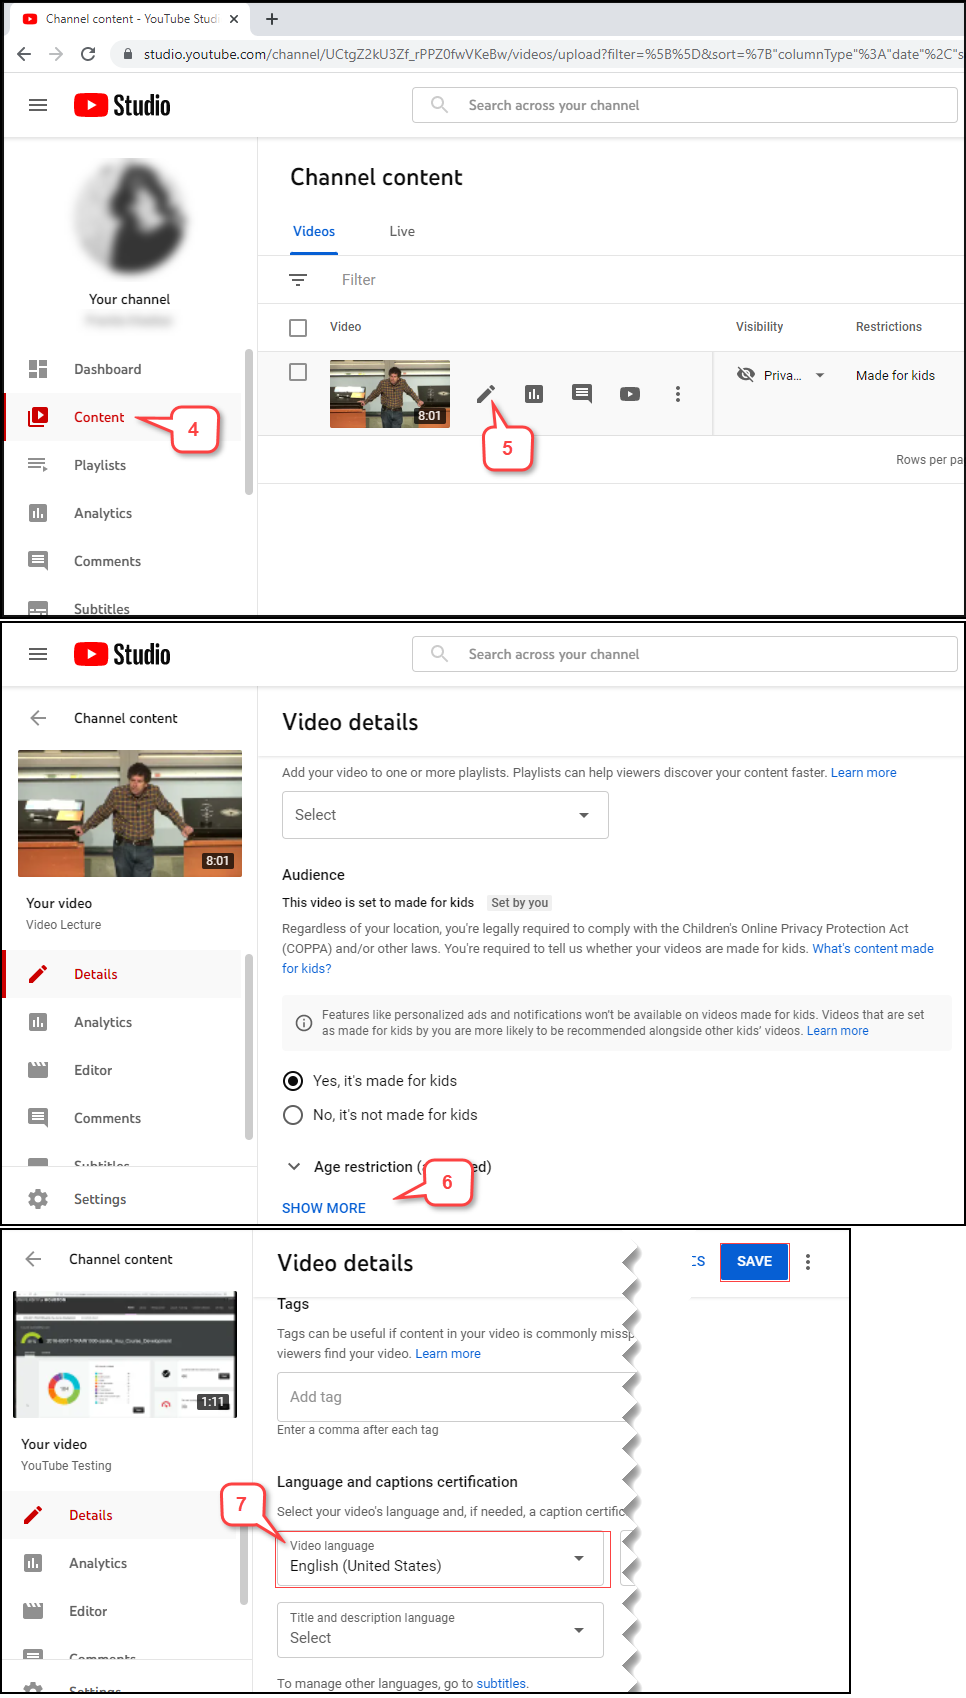
- Click Content on the left side. It will show all the videos you have uploaded.
- Select the pencil icon (Details) for the video you want to edit.
- In the “Video Details” page, scroll Down & Click on Show More.
- Scroll Down to Language and Captions Certifications and Select the Video Language to English. Then click Save on the top.
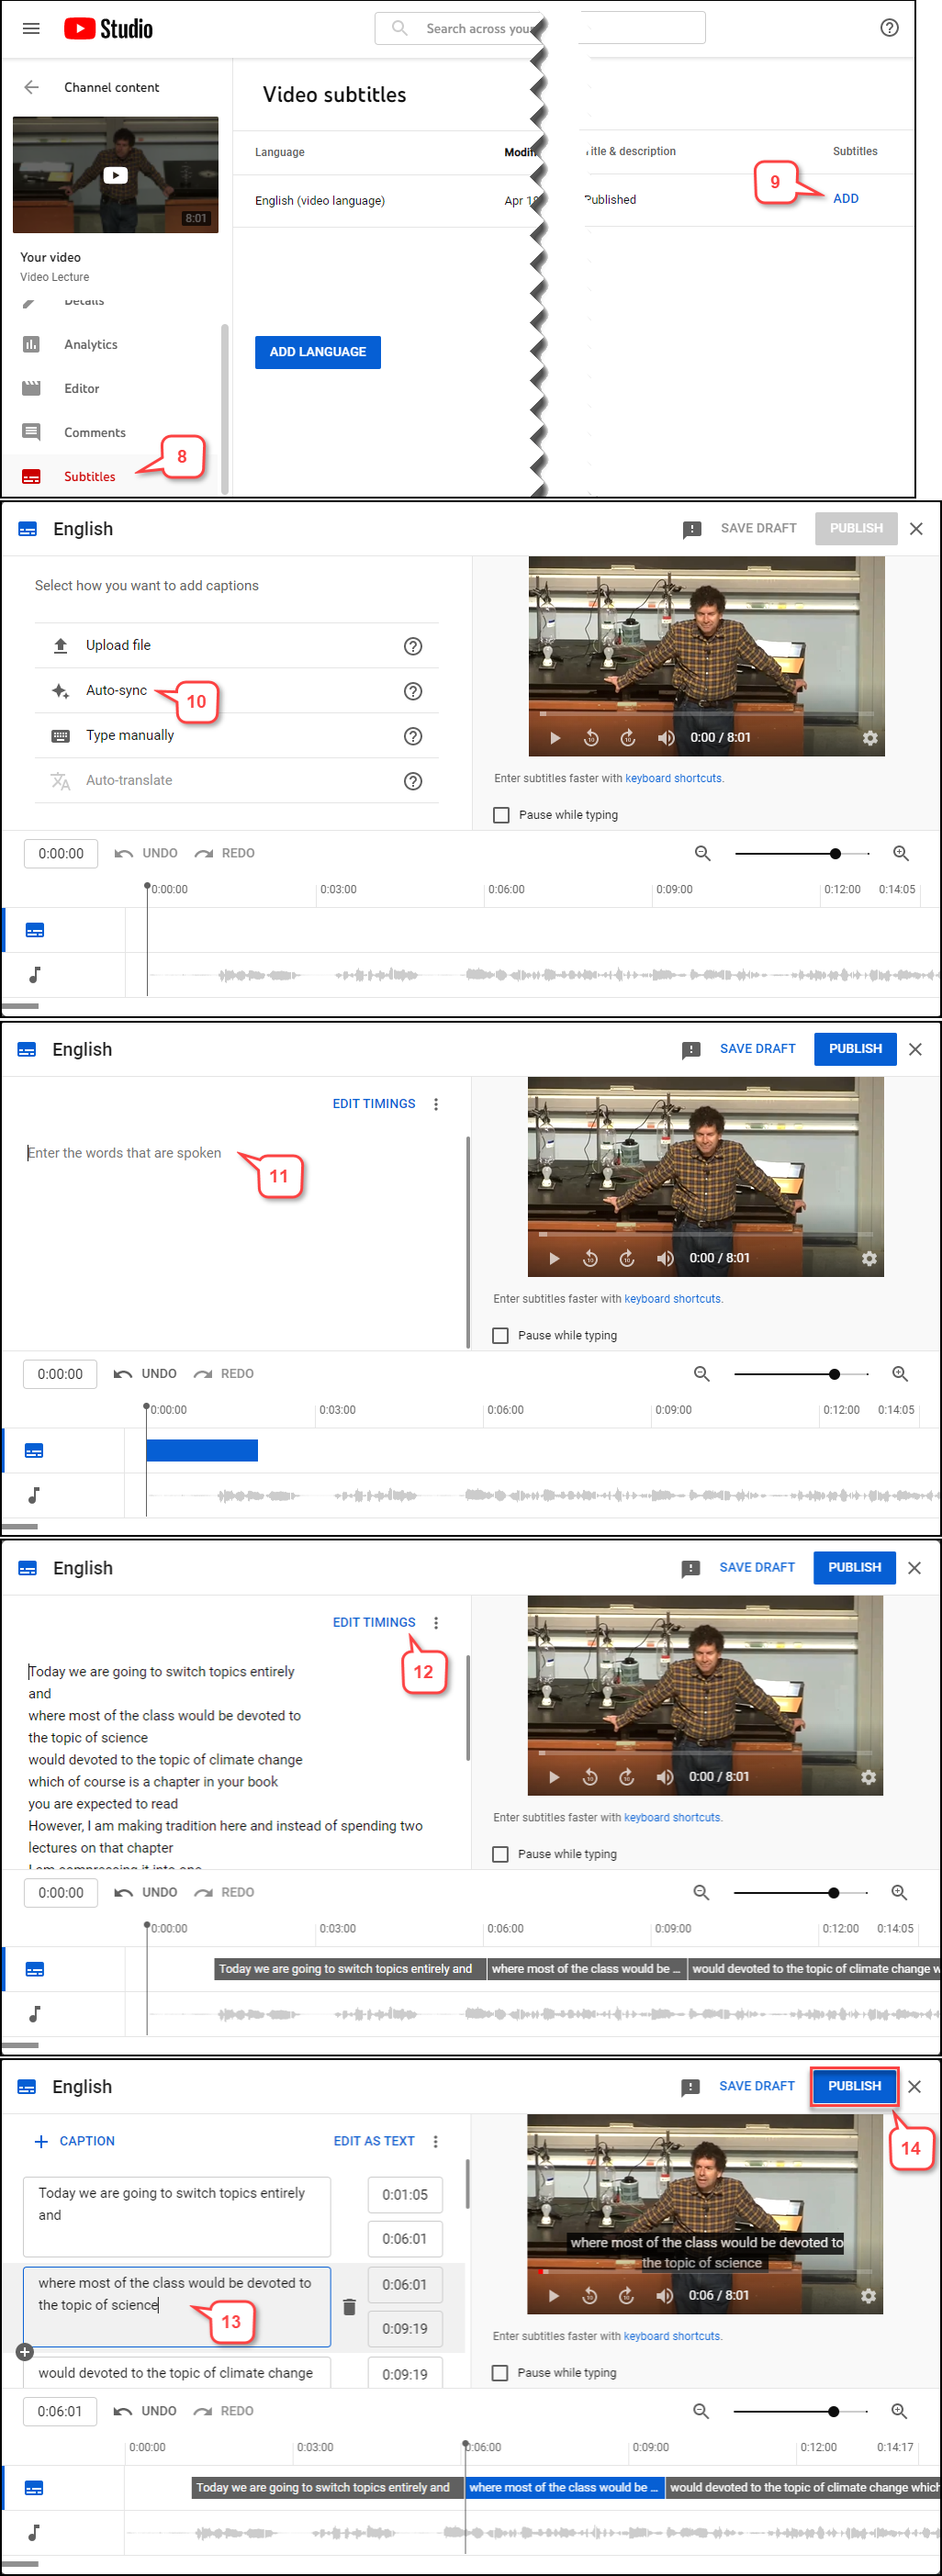
- Click on Subtitles on the left side.
- Click Add to add new subtitles.
- Click on Auto-Sync.
- Enter the Subtitles and the Timings will be set automatically.
- Click on Edit Timings.
- Review and Edit the Captions.
Note: Although YouTube has pretty accurate captions, automatic captions might misrepresent the spoken content due to mispronunciations, accents, dialects, or background noise. Therefore, you need to check automatic captions.
- Click Publish.
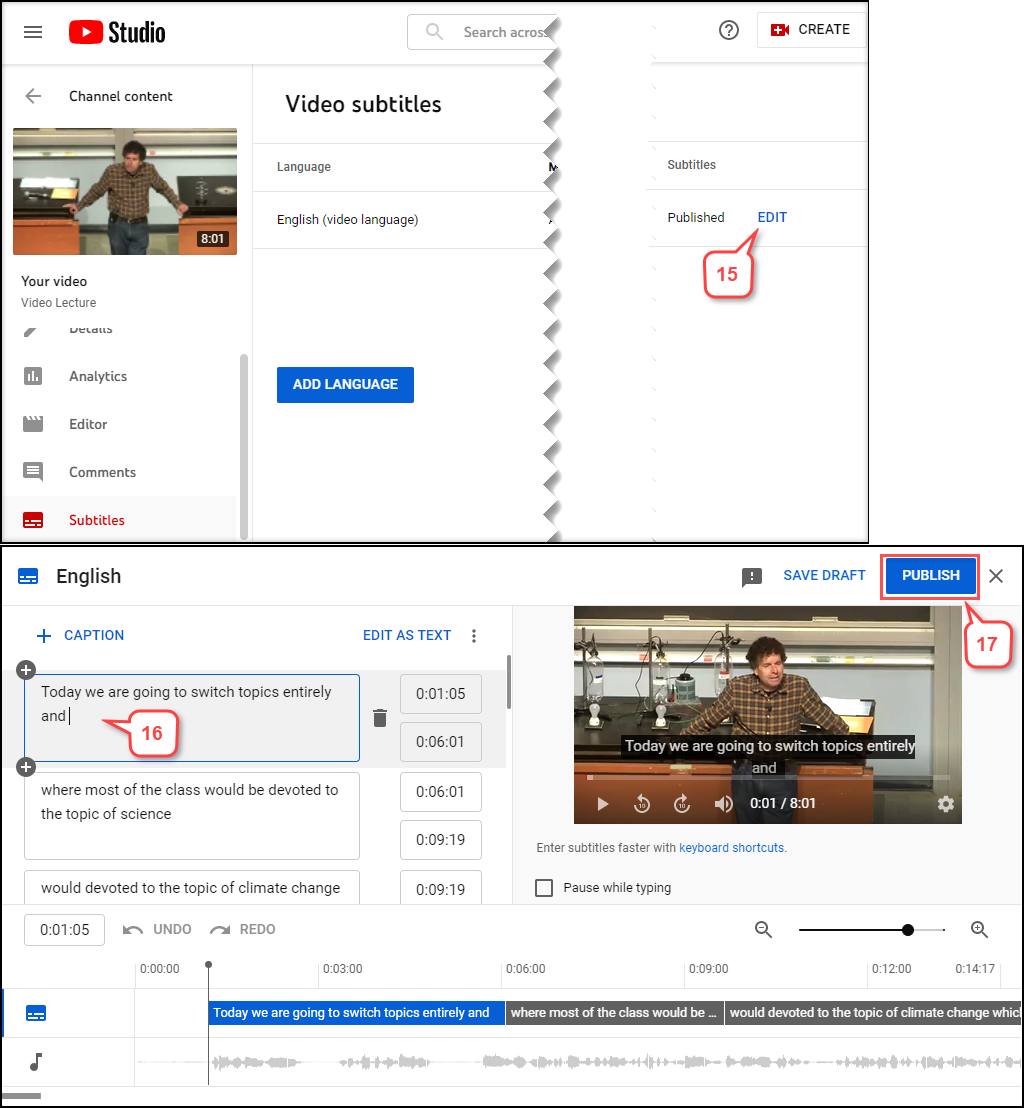
- If you would like to edit your captions now, click Edit
- Click on the caption text you want to edit.
- After editing, click Publish.