- /
- /
- /
How to Use Accessibility Checker for Microsoft Files
Microsoft Office has a built-in Accessibility Checker tool which finds accessibility issues and warnings, explains the reasons for them, and offers solutions. This tutorial shows you how to use the Accessibility Checker for Word or Powerpoint files on Windows, Mac, and Office 365.
Part I. Windows
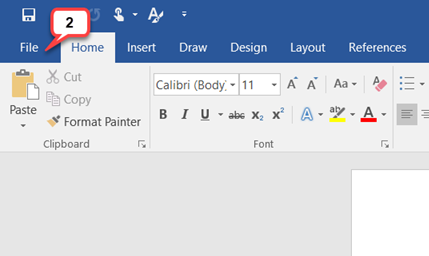
- Open any Microsoft Office file.
- In the menu, select the “File” tab.
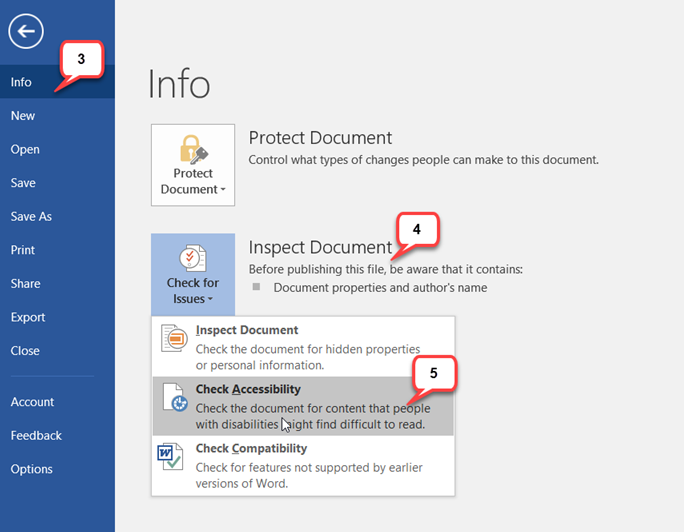
- In the sidebar menu, select the “Info” link.
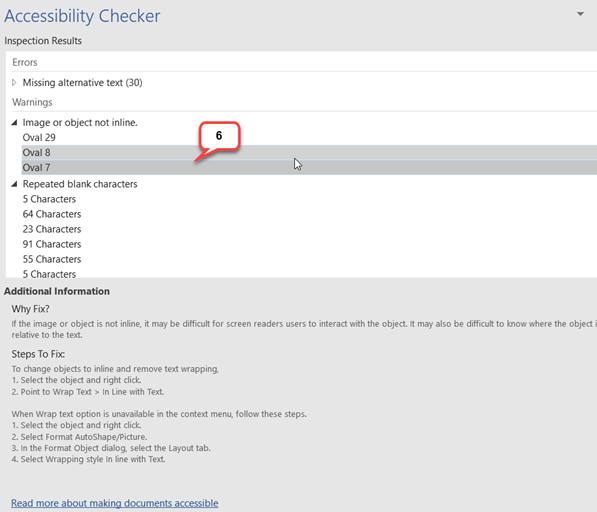
- Select the “Check for Issue” link.
- From the drop-down menu, select “Check Accessibility”.
- An Accessibility Checker panel will open to the right of the document. This panel provides you with a list of errors and warnings. When you click on an error or warning, instructions on how to fix it appear below the “Additional Information” section.
Part II. Mac
If you are a Mac user, you need to have Microsoft Office 2016 version because the Accessibility Checker was not available in earlier versions.
- Open any Microsoft Office file.
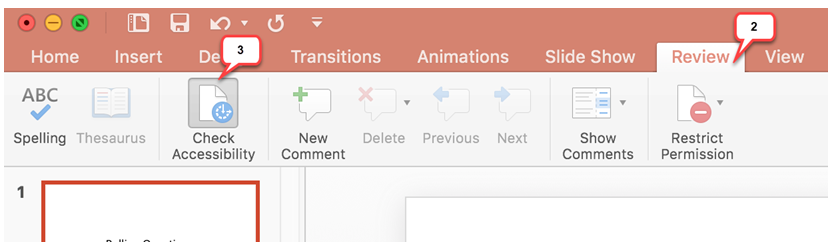
- In the menu, select the “Review” tab.
- In the Review ribbon, select the “Check Accessibility” link.
- An Accessibility Checker panel will open to the right of the document. This panel provides you with a list of errors and warnings. When you click on an error or warning, instructions on how to fix it appear the “Additional Information” section.
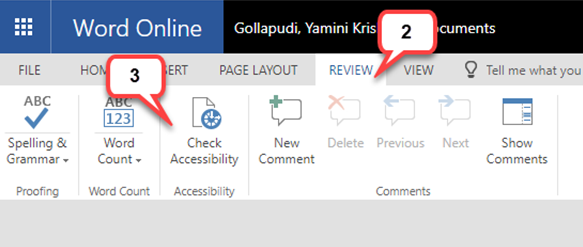
Part III. Office 365
- Open any Microsoft Office file in Office 365.
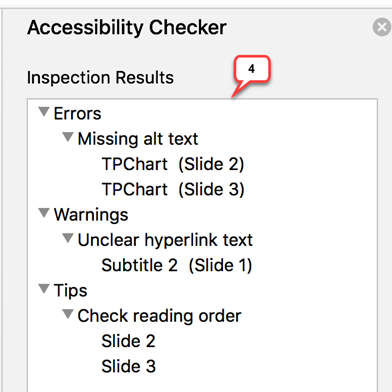
- In the menu, select the “Review” tab.
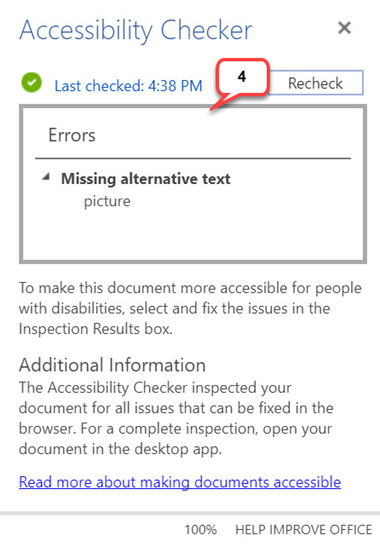
- In the Review ribbon, select the “Check Accessibility” link.
- An Accessibility Checker panel will open to the right of the document. This panel provides you with a list of errors and warnings. When you click on an error or warning, instructions on how to fix it appear below the “Additional Information” section.