- /
- /
- /
Canvas: How to Publish Your Exam from Respondus to Canvas
TIP: Check for the software update if you have an issue connecting or adding a server. If the problem still exists, reinstall the Respondus software, Respondus download link.
Importance: After installing the software, you must update the software immediately.
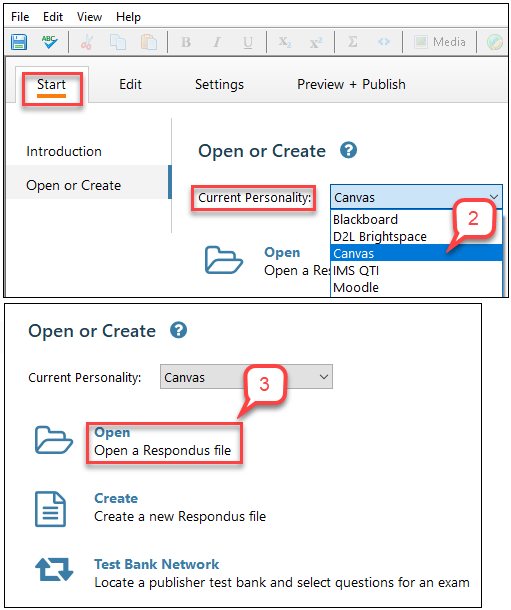
- Open the Respondus program.
- At the “Start” tab, under the “Current Personality,” select Canvas.
- Click Open on the main screen.
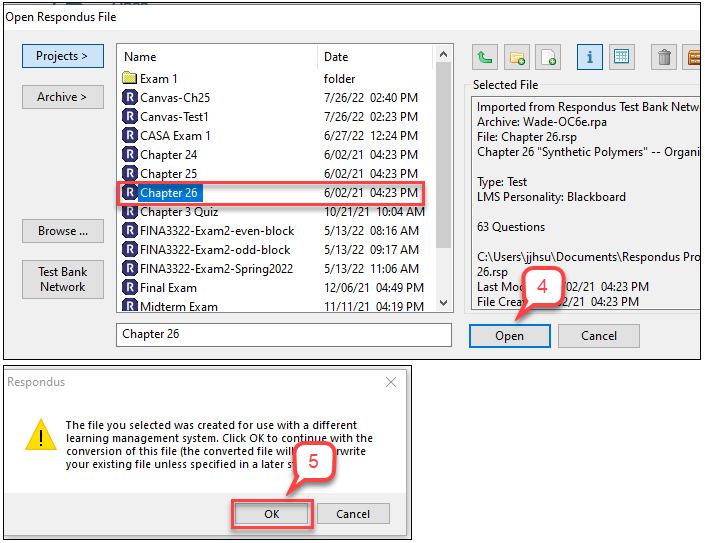
- Select your Respondus file and then click Open. If your Respondus file is for Canvas personality, go to the Step 7 directly.
- If your Respondus file is the Blackboard personality, it asks to convert a file created in a different learning management system, click OK.
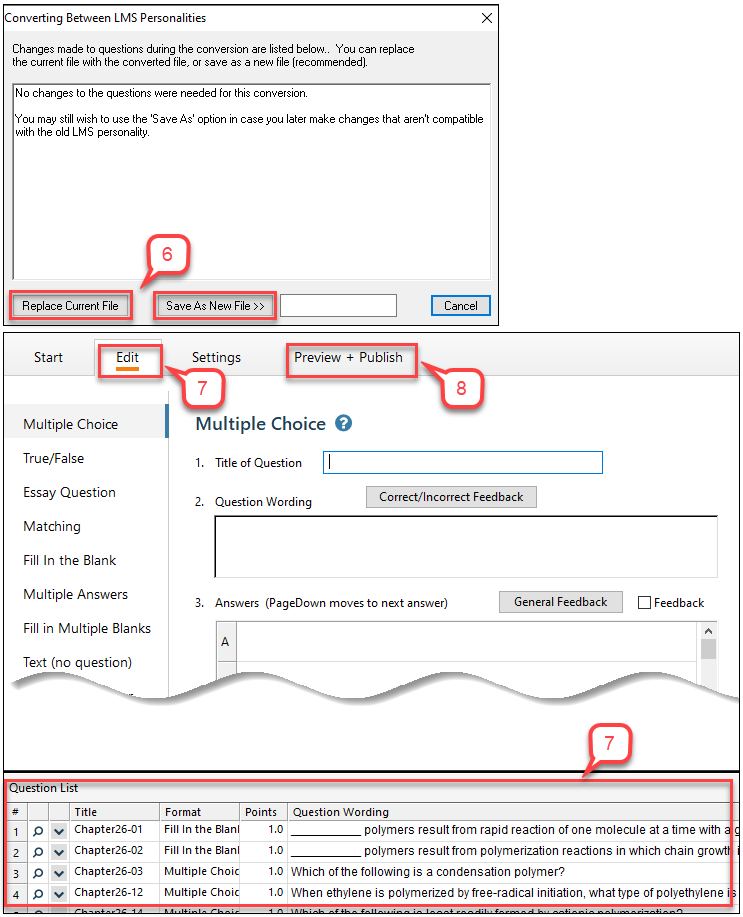
- It shows if the conversion is successful. It also asks to select Replace Current File or Save As New File.
- The exam questions will open in the “Edit” tab.
- Select the Preview & Publish
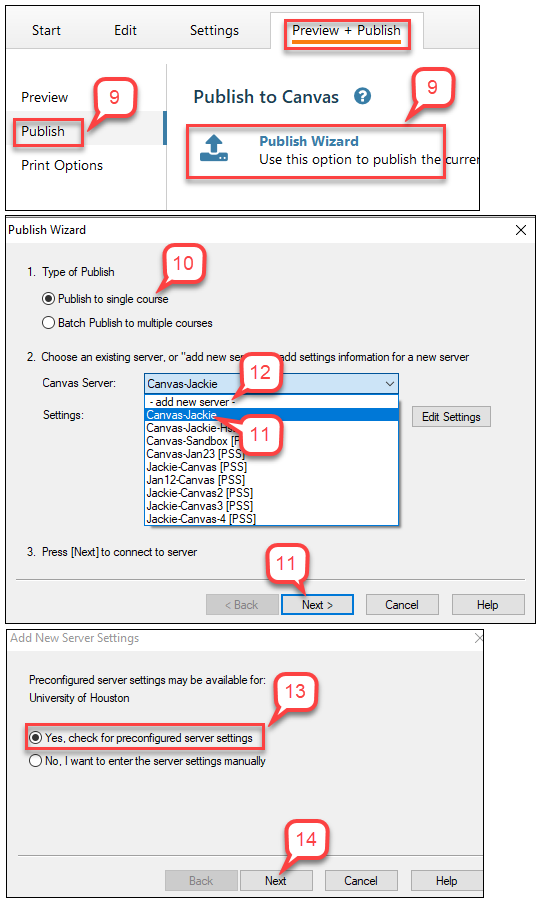
- In the “Preview + Publish” tab, click Publish. Then, click Publish Wizard.
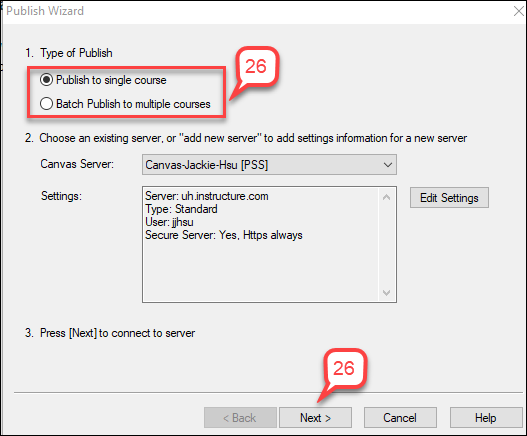
Note: We recommend clicking on Preview to preview the quiz questions before publishing. - In the “Type of Publish” section, select Publish to single course (by default.)
- In the “Canvas Server” section, choose an existing server, and click Next. Then go to the step 27 directly.
Note: If you have not setup a new Canvas server connection. You will do this setup in steps 12-26.
Add New Server Steps: 12-26
- Next to the Canvas Server and choose add new server.
- In the “Add New Server Settings” window, select “Yes, check for preconfigured server settings” option.
- Select Next.
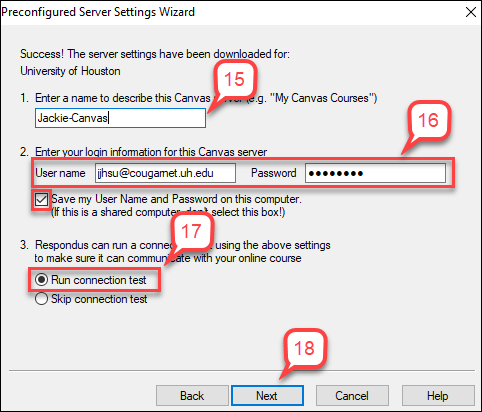
- Enter a name to describe this server.
- Enter your login information using your Office 365 sign-in for Canvas. Select “Save my Username and Password on this computer” if this is not the shared computer.
- Make sure the “Run connection test” is selected.
- Click Next.
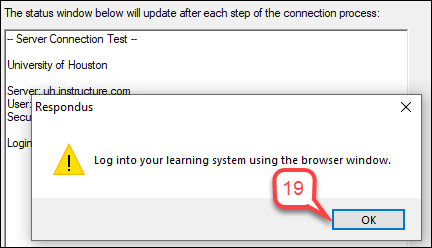
- A message “Log into your learning system using the browser window” is shown, click OK.
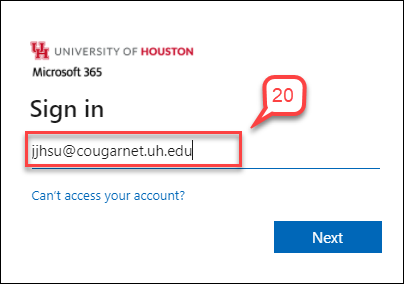
- Enter your UH office 365 sign in.
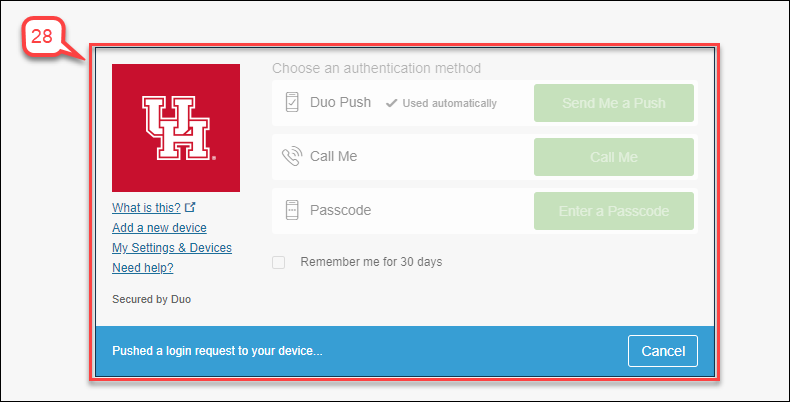
- Do UH Duo Authentication.
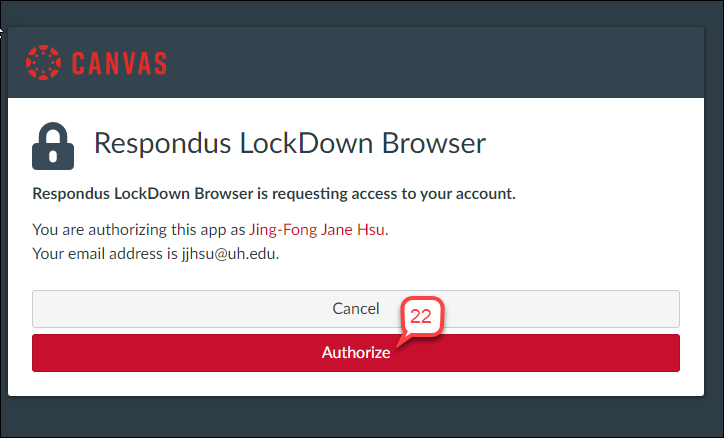
- Select Authorize button to allow Respondus to access your account.
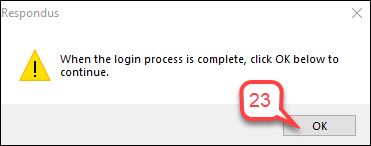
- A message “When the login process is complete” is shown, click OK.
- When the server connection test successfully, click Next.
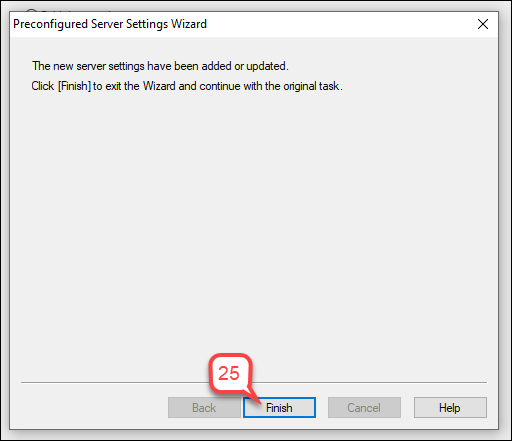
- A message “The new server has been added” is shown, click Finish. It returns to the Publish Wizard.
- In the “Publish Wizard” page, select Publish to single course or Batch Publish to multiple courses. Then click Next. Then go to step 29 directly.
Publish Wizard
- Enter your UH office 365 sign in.
- Do Duo authentication.
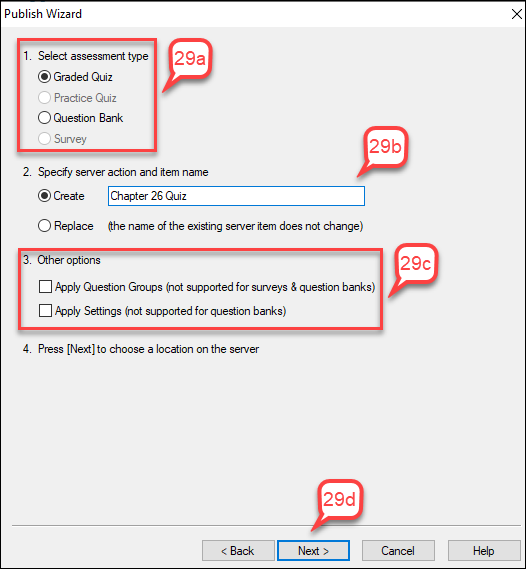
- In the “Publish Wizard” page:
a) Select assessment type– Graded Quiz or Question Bank.
b) Specify Server action and item name.
c) Select Other options. (Not required.)
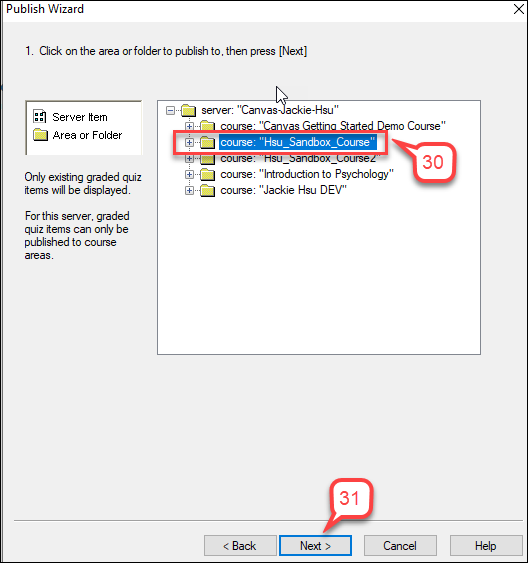
d) Click Next. - Choose the course you are adding the Quiz to.
Note: Choose the course folder only. Do not click on the name of a particular quiz in that course. - Click Next.
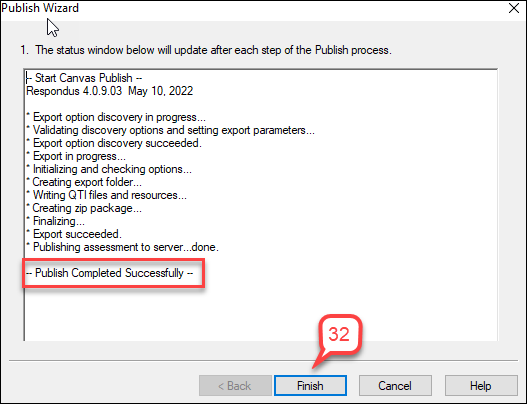
- Wait until you see the line “Publish Completed Successfully”, and then click Finished.