- /
- /
- /
How to create Breakout Rooms in Microsoft Teams
The Breakout rooms allow a meeting organizer to divide the meeting into sub-groups to facilitate discussions and brainstorming sessions. The organizer can start the Breakout rooms in a Teams meeting or a Teams channel meeting. The meeting organizer can create, rename, and delete rooms as needed. Once the Breakout rooms are open, the meeting organizer can join any of the Breakout sessions. The organizer can send announcements to the breakout rooms and recall all participants back to the main meeting at any time.
Note:
- It is only for Microsoft Teams Desktop App (PC & Mac.) It is not available for Mobile or Web version. You need to be a meeting organizer and be present in the meeting.
- You can only organize the participants into Breakout rooms once the meeting has started.
- Participants can join a Breakout room via Desktop, Mobile, or Web version. In the Breakout room, participants can record the meeting or use Whiteboard to collaborate the work.
Part I: Create Breakout rooms
- Start the scheduled meeting.
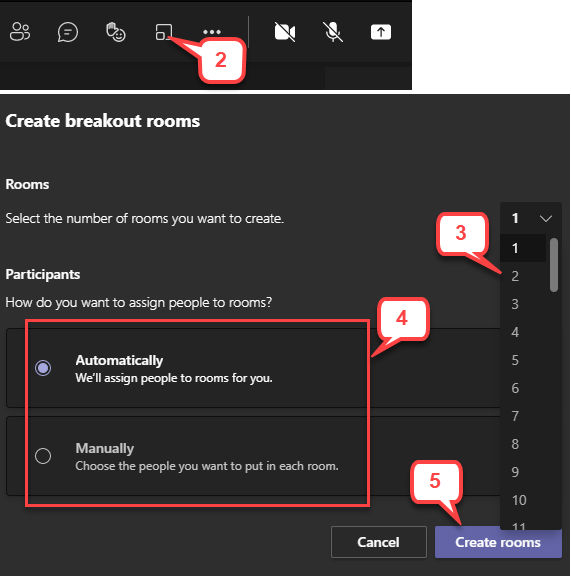
- After participants joined the meeting, select Breakout rooms in the meeting controls.
- In the “Room” section, select the number of rooms you want from the drop-down.
Note: The maximum of breakout room is 50. - In the “Participants” section, select Automatically or Manually to assign participants.
Note: This is only time you can choose to assign participants automatically to room. You won’t be able to choose this option later in the meeting. - Select Create Rooms.
Part II. Assign Participants to Rooms
If you chose Automatically, participants will already be assigned to different breakout rooms. Use the following instructions to manually add participants to rooms:
- In the meeting controls, select Breakout rooms.
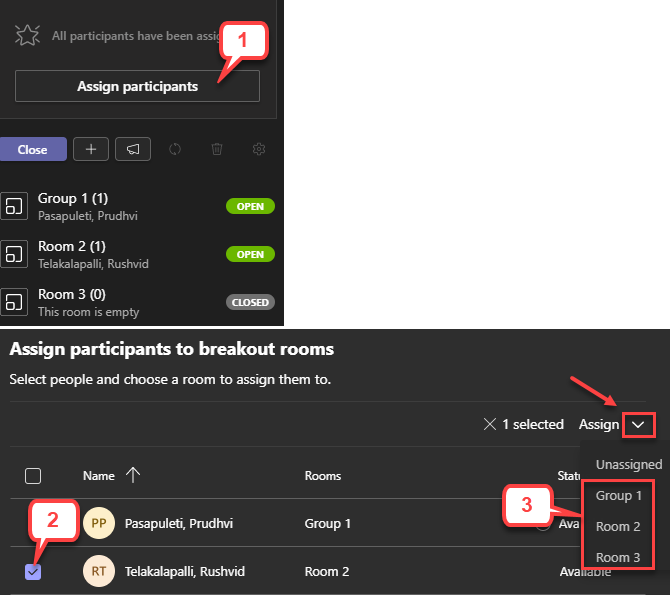
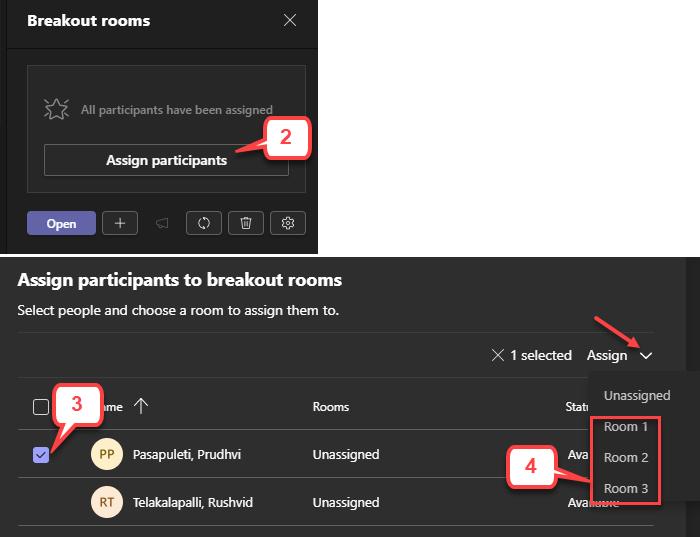
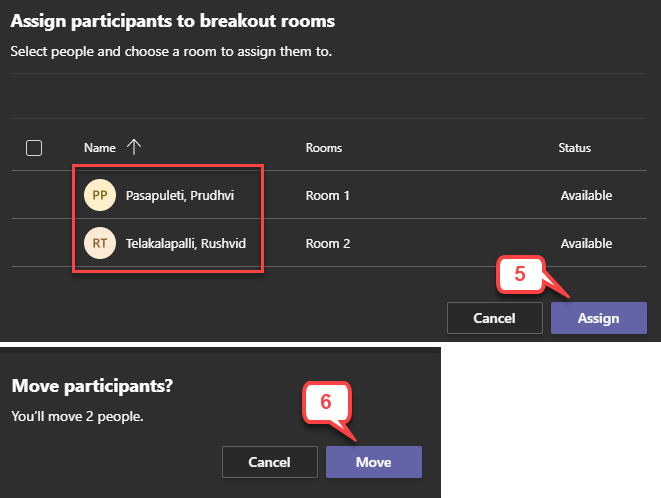
- In “Breakout rooms” panel, click Assign participants button.
- Choose the people you want in a room by selecting the checkbox next to their names.
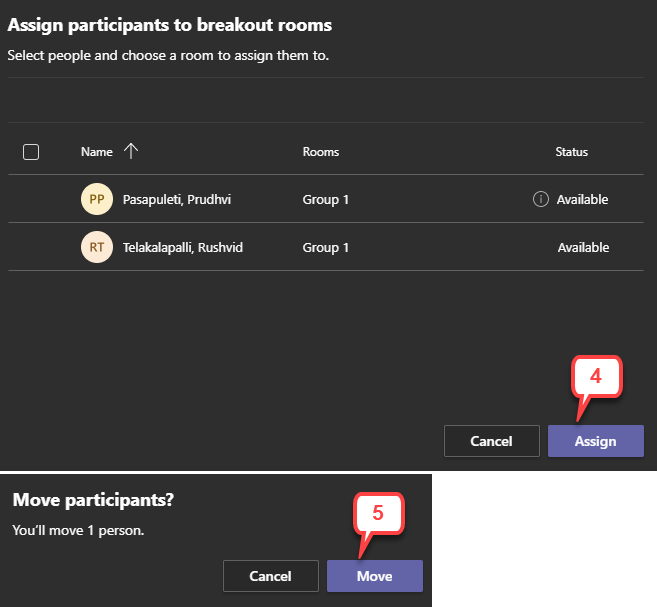
- Select the down-arrow next to Assign and choose a room for them.
- Repeat the previous steps until everyone in the meeting is assigned to a room. When you’re done, select Assign.
- A message “Move participants?” message is shown, select Move.
Part III. Rename, Delete, or Add a Room
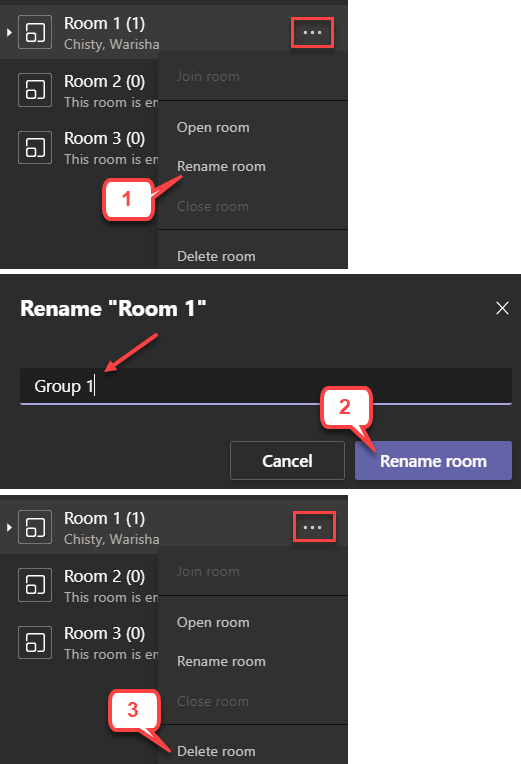
- By default, the Breakout rooms are named as Room 1, Room 2, ..etc. To rename the room, click the room’s 3 dots (… more options,) then select Rename room.
- Enter the new name for the room, then select Rename room.
- To delete a Breakout room, click the room’s 3 dots (… more options,) then select Delete room.
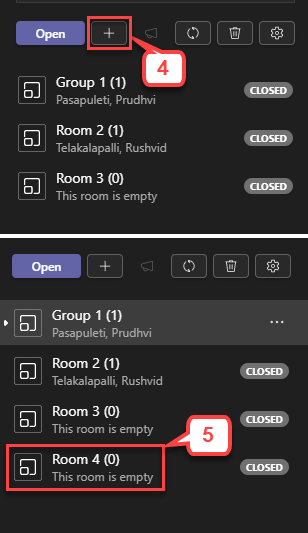
- To add an additional room, in the “Manage rooms” section, click + button.
- A new room is added into the end of the room list.
Part IV. Start Breakout Rooms and Join a Breakout Room
- When you are ready to split participants into Breakout room, do one of the following
a) To open all the rooms at the same time, select Open.
b) To open a single room, hover over the room, select 3 dots (… more options,) and choose Open room.
- When the status of rooms changes to Open, you will know rooms have opened successfully.
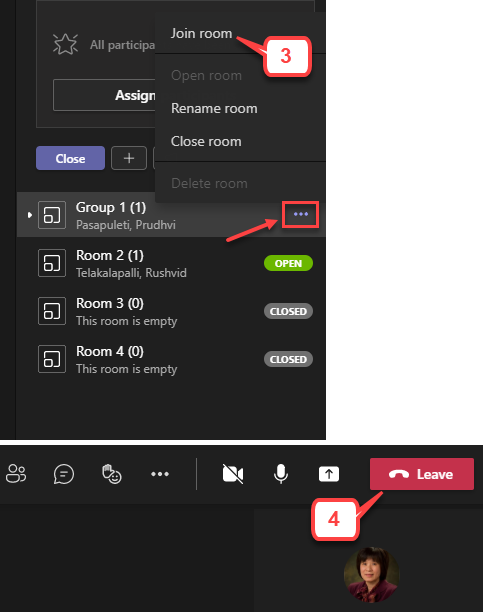
- To join a Breakout room, click the room’s 3 dots (… more options) and select Join room.
Note: Participants do not receive any notification of the organizer’s joining. - To leave the Breakout room and return to the main meeting, select Leave in the meeting control.

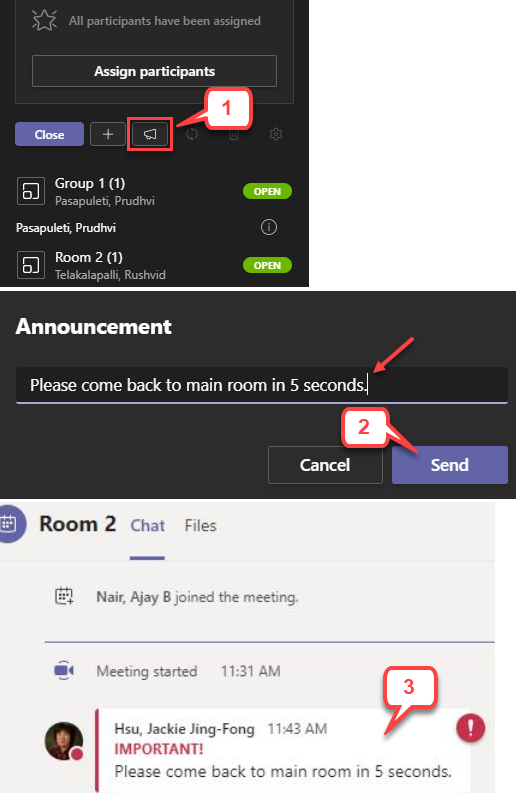
Part V. Send an Announcement to Breakout Rooms
- To broadcast an announcement message via meeting chat to all Breakout rooms, in “Breakout rooms” pane, select the bell icon (Make an announcement.)
Note: Participants can see this announcement message and respond it in the Breakout room chat. Organizer also can access each Breakout room chat.
- Type in your message and then select Send.
- Participants will receive a notification in their meeting chat to check for your announcement.
Part VI. Reassign participants
You can swap participants into different rooms when breakout rooms are open or closed.
- Select Assign participants.
- Choose a student by selecting the checkbox.
- Click the drop-down arrow next to Assign and select a Breakout room you’d like to move the student to.
- Click Assign button.
- A message “Move participants?” message is shown, select Move.