- /
- /
- /
How to Reduce Background Noise in Teams Meeting
When you turn on the mic in a Teams meeting, sometimes unexpected background noise occurs, such as barking dogs, or slamming doors, which can distract other participants. Now, Teams offers three levels of noise suppression to help keep meeting participants focused. You have two options to setup this noise suppression.
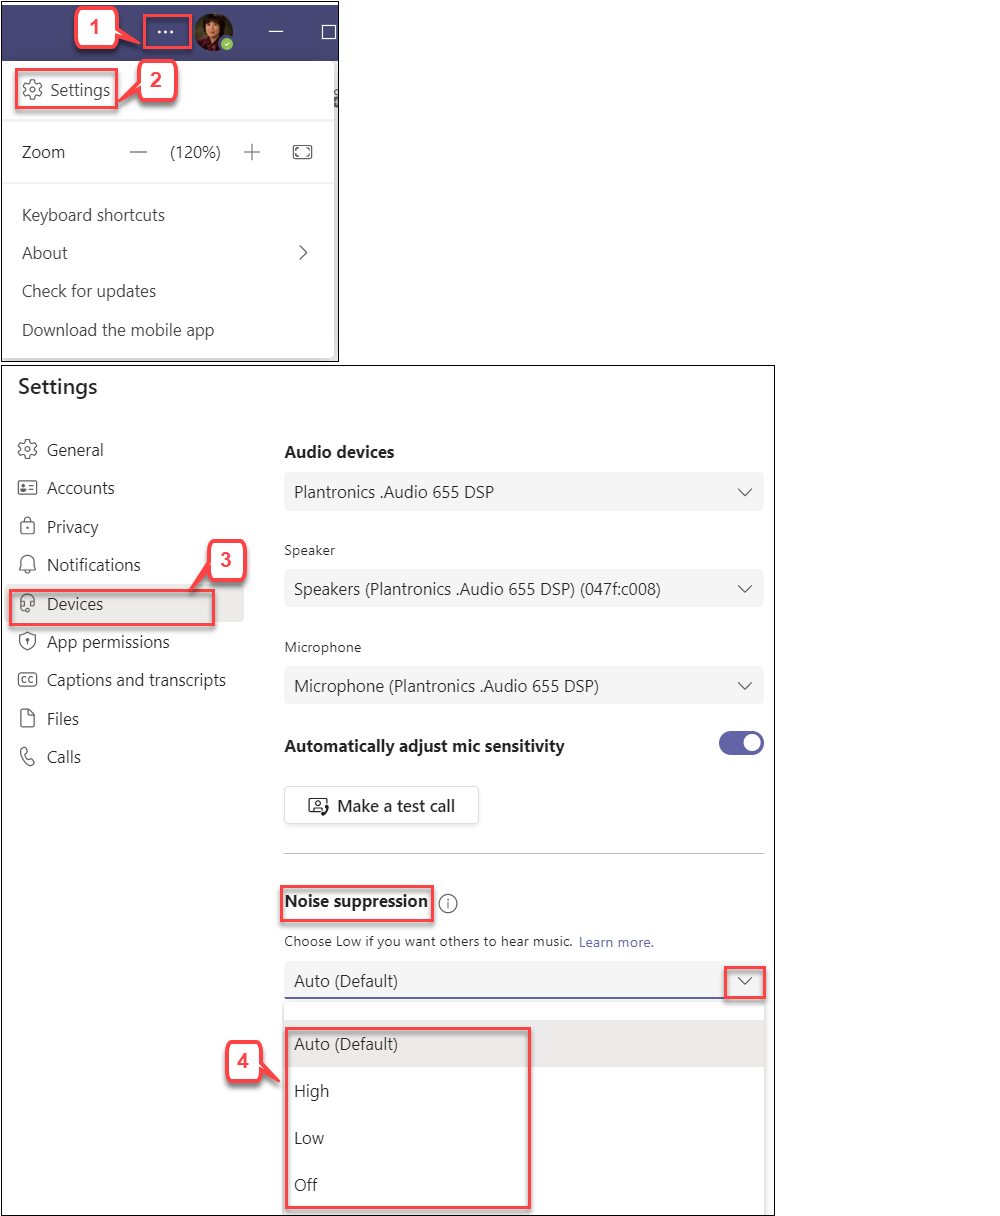
Option I. From the Main Teams Window
Note: This option can select suppression level permanently.
- In Main Teams window, select three dots (…) next to your profile picture at the top right corner of Teams.
- Select Settings.
- Select Devices.
- Under the “Noise suppression” section, click the drop-down arrow next to the “Auto (default)” to see the options.
- Select one of the following options.
- Auto (default) – The Teams app decides on the best level of noise suppression based on local noise.
- High option – Suppresses all background sound that isn’t speech.
- Low option – Suppresses low levels of persistent background noise, such as a computer fan or air conditioner. Use this setting for playing music.
- Off option – Noise suppression is disabled. Use this setting for high-fidelity microphones in low noise environments.
Note:
- The “High” option does not work if the live captions is turned on.
- For the “High” option, your computer’s processor must support Advanced Vector Extensions 2 (AVX2).
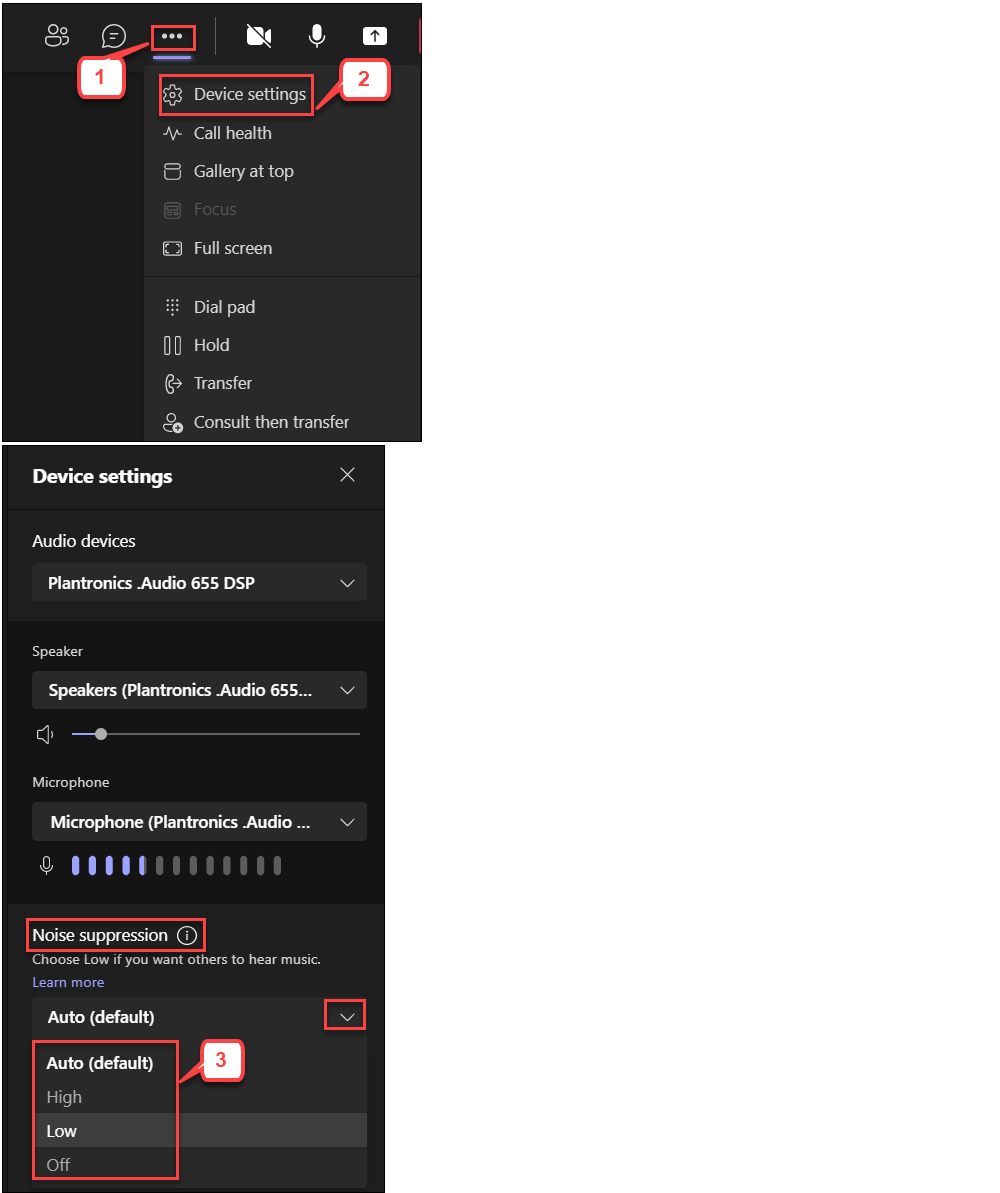
Option II. From a Meeting Window
Note: This option is to affect the noise suppression level for a meeting you are currently in.
- In Teams meeting controls, select More options.
- Select Device settings.
- Under “Noise suppression” section, select an option. (See step 4 above for option descriptions.)