- /
- /
- /
Restricting participant access in Microsoft Teams Meetings
By default, everyone who joins your meeting has presenter access. Use Meeting Options to control who can share content in a meeting and reduce the risk of uninvited guests or content.
You can access the Meeting Options by editing a scheduled meeting. You can also access Meeting Options during the meeting in Show Participants or More Actions. The steps below will demonstrate how to get to Meeting Options by editing a scheduled meeting. For more information on the other ways to get to Meeting Options see Microsoft’s Participant Settings Guide.
Part 1: Set Attendee Access
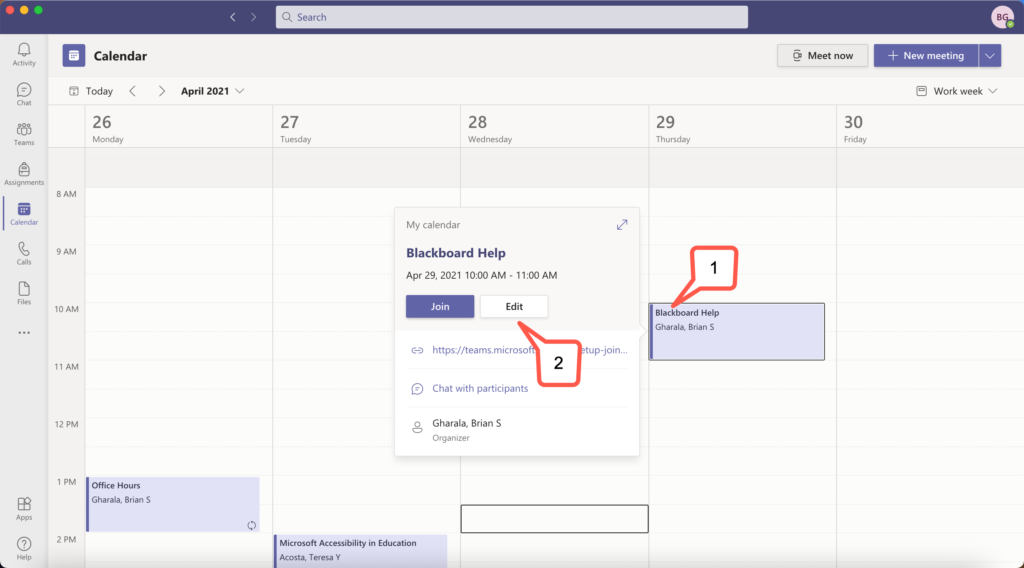
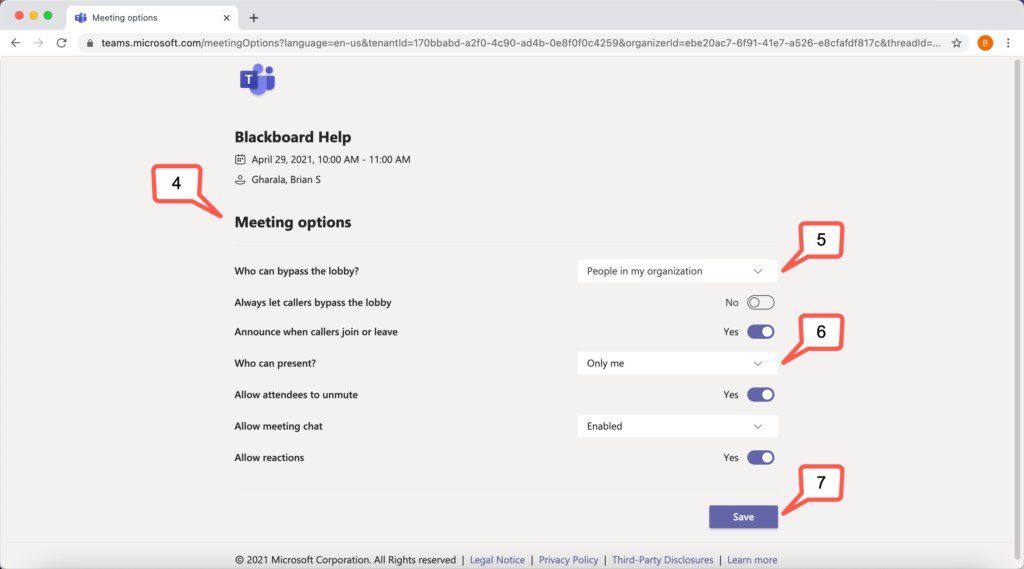
- In the Teams Calendar click on the scheduled meeting.
- Click Edit.
- Click Meeting options.
- The Meeting options page will open in your internet browser.
- Set “Who can bypass the lobby?” to People in my organization.
- Set “Who can present?” to Only me.
- Click Save

Part 2: Give Attendee the Presenter Access
If you follow the steps in Part 1 everyone that joins the meeting will be an attendee. If you want an attendee to share, you can make that attendee a presenter.
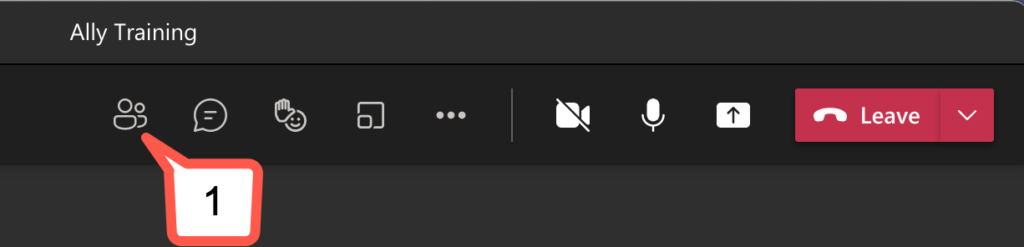
- While in the meeting click Show participants.
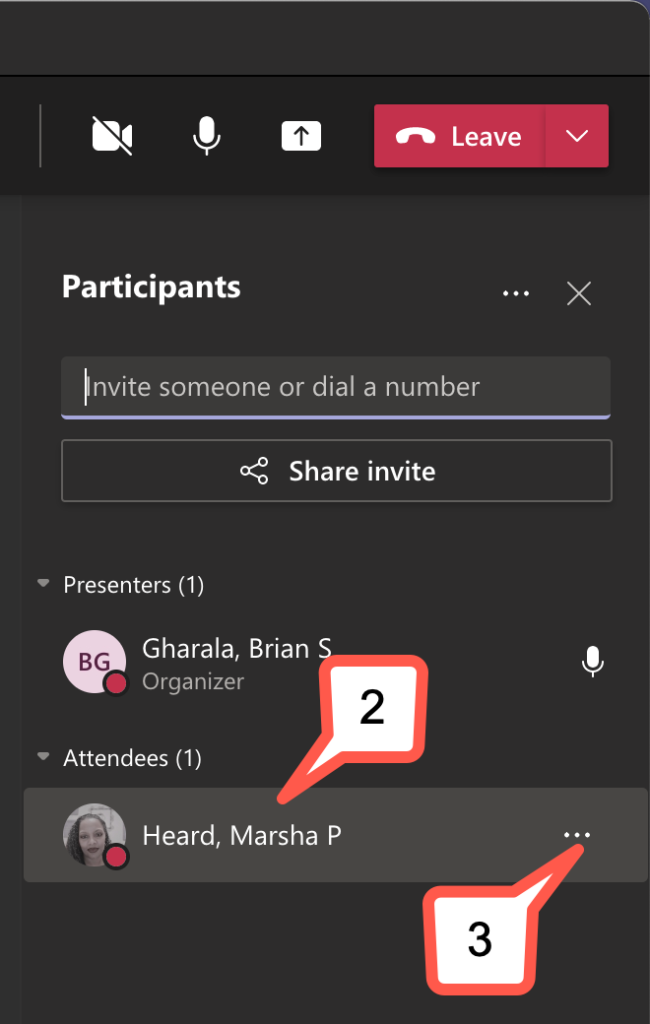
- Hover over the name you want to give access.
- Click the More options ellipses.
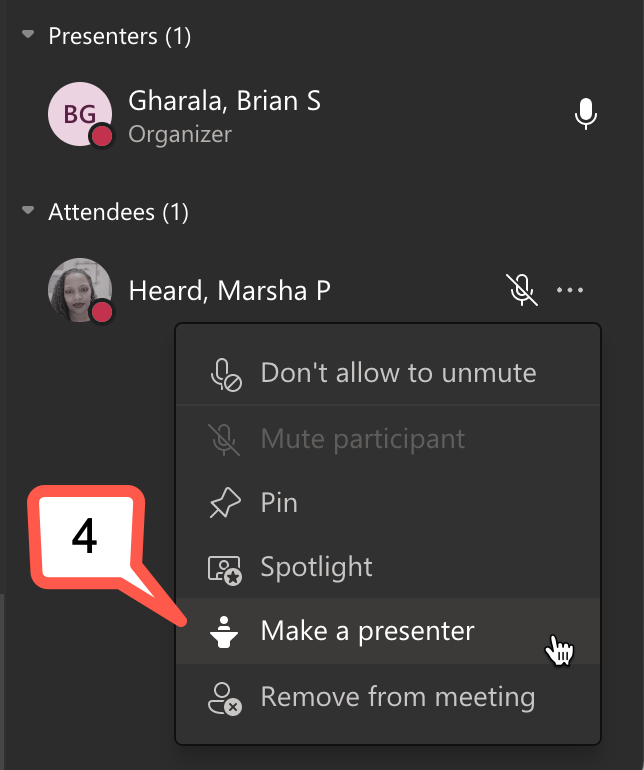
- Select Make a presenter.
- Click Change in the box that appears.
Note: You can follow the same steps to make a presenter an attendee.