- /
- /
- /
TP8: How to Create Questions for Anywhere & Self-Paced Polling
If you don’t use PowerPoint for the lecture, you can do the Anywhere Polling which does not need PowerPoint software. To create new questions for Anywhere Polling, you will need to first set up a question list and then add questions.
Part I: Set up the Question List
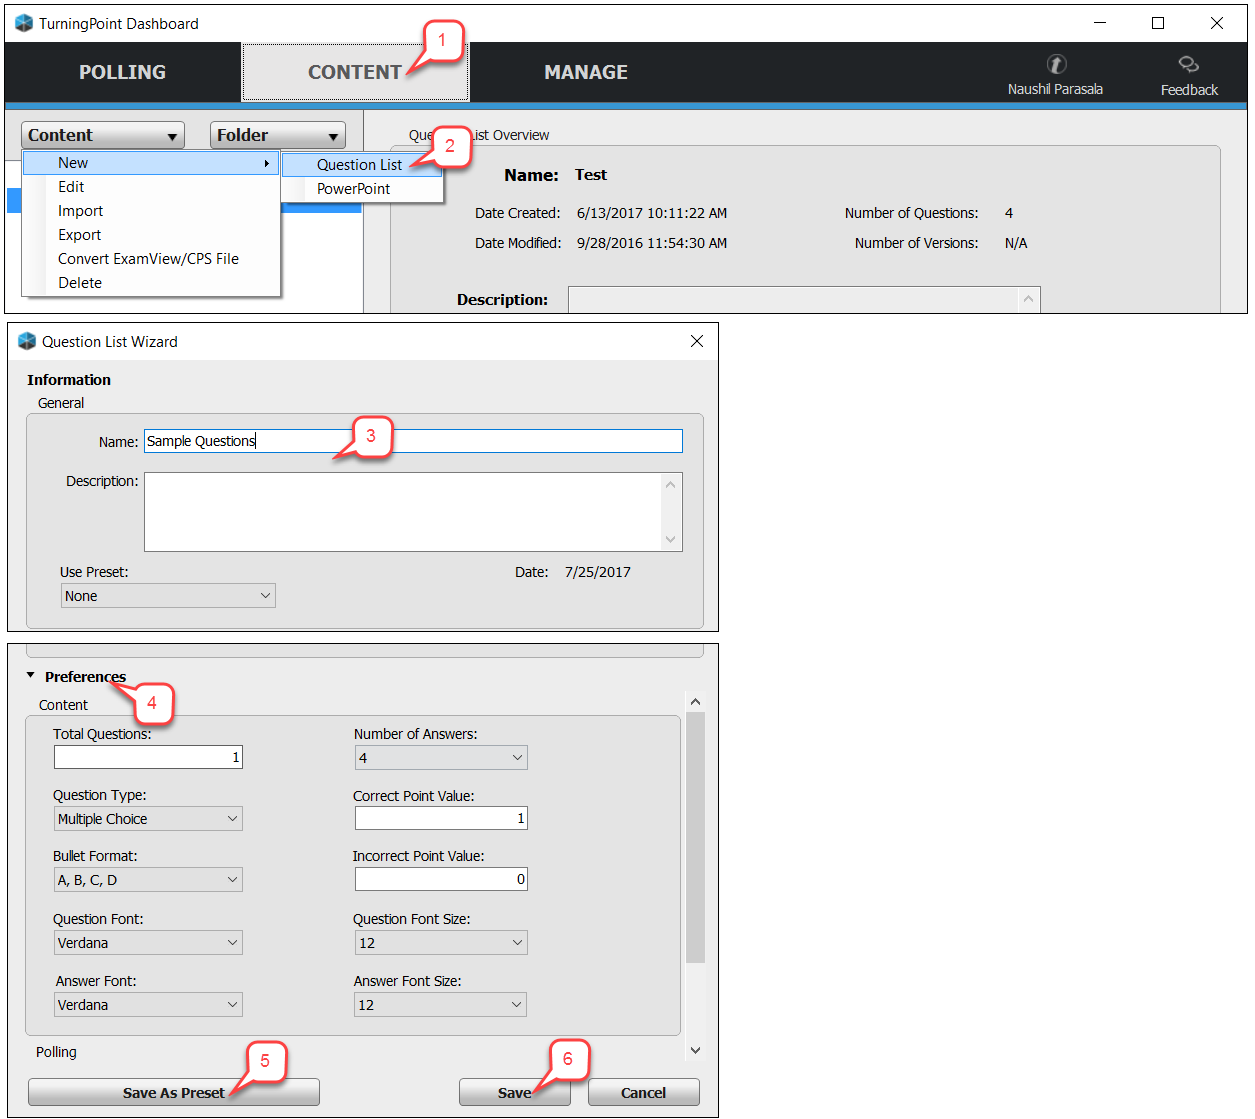
- From the TP 8 dashboard, click the Content tab.
- In the Content drop down menu, click New > Question List.
- In the Question List Wizard, enter a name and an optional description.
- Click Preferences to expand. Select any additional options. These options will be the default for all questions created in this question list. However, you can make changes to individual questions later as necessary.
Note:The default question and answer font size is 12 pt. This will show up as very small on a projection screen. It is highly recommended you increase this font size to at least 28 pt. - Click Save As Preset to save these options as default for future use. You will be prompted to name and save the preset name.
- Click Save.
Part II: Add Questions
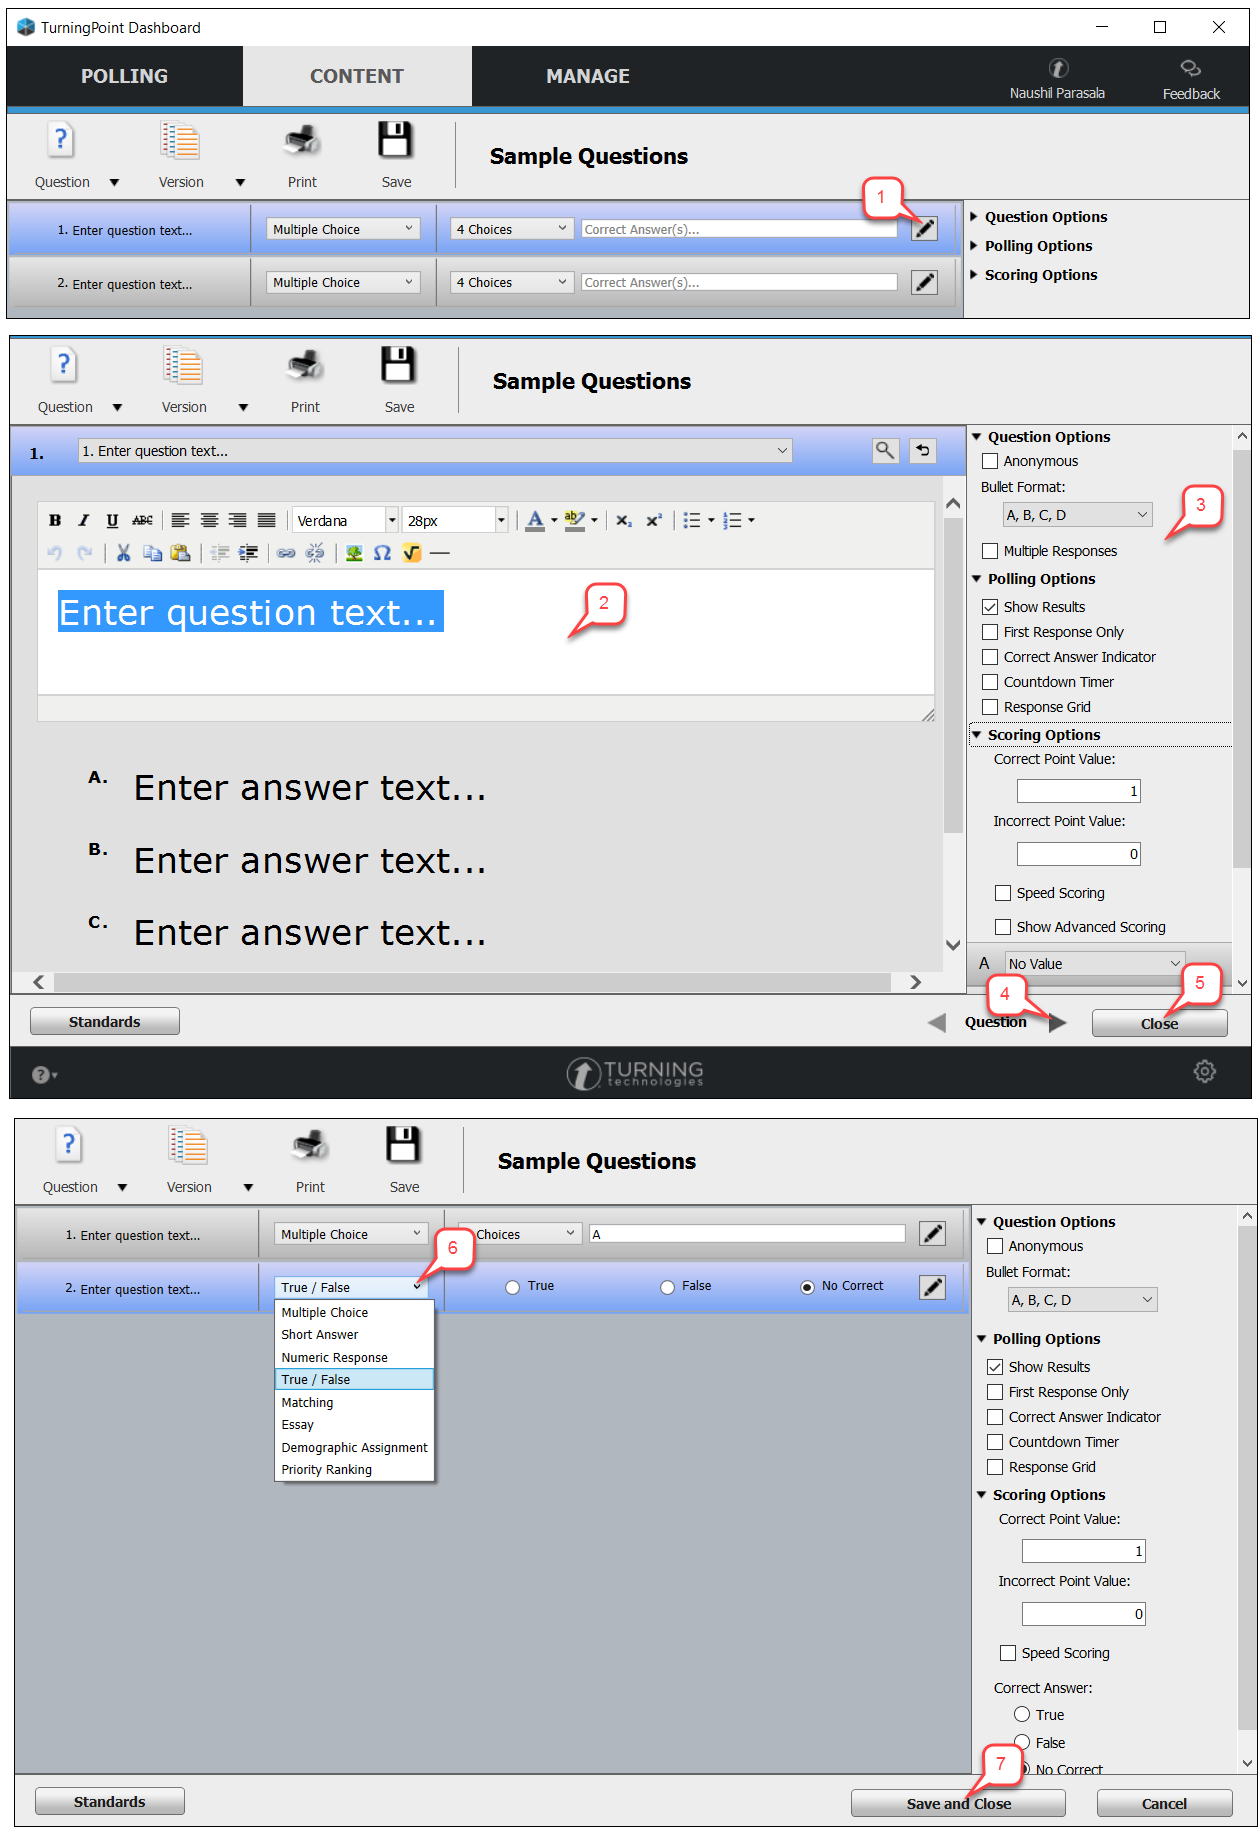
- From the Question List page, click the pencil icon to open a question for editing.
- Enter text for the question and all the answer choices.
Note: The text editor includes many features you can use to incorporate into your questions: hyperlinks, images, formulas, etc.
- Determine additional Question, Polling and Scoring options (e.g. add a countdown click, select the correct answer, etc.)
- Click the arrow button to advance to the next question.
- When you finish creating questions, click Close.
- Note: From the main question screen, you can drag and drop questions to rearrange the order. You can also choose a different question type, change the number of answer choices, and determine additional options.
- When all questions and options are set, click Save and Close. The Question List is created and is added to the Content Folder.