- /
- /
- /
How to Create an Accessible Word Document
Almost all instructors have used Word documents for their course content. However, instructors might not be aware that their Word documents have some barriers for students with disabilities. We have compiled a list of the best practices for making Word documents accessible. You can use the list as a guideline to check if each element of your Word document is accessible.
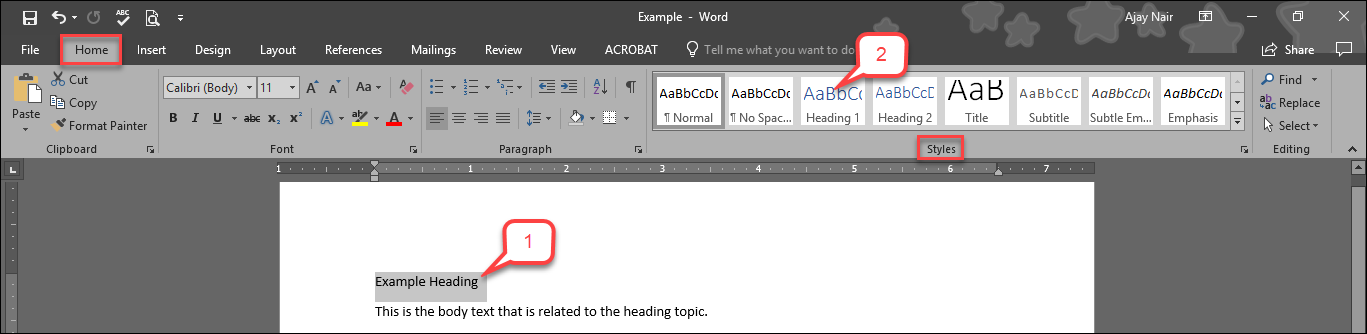
Use Headings
In order for the assistive technologies to read your Word document correctly, you need to use appropriate headings to structure the document. Microsoft Word has the built-in headings for you to use easily. It is important to organize headings in the prescribed logical order and not to skip heading order. For example, Heading 1 is used for a page title for main content headings, Heading 2 is used for major section headings, and Heading 3 is used for sub-sections under Heading 2.
- Select the heading text in document.
- On the Home tab, in the Styles group, select a heading style, for example, Heading 1 or Heading 2.
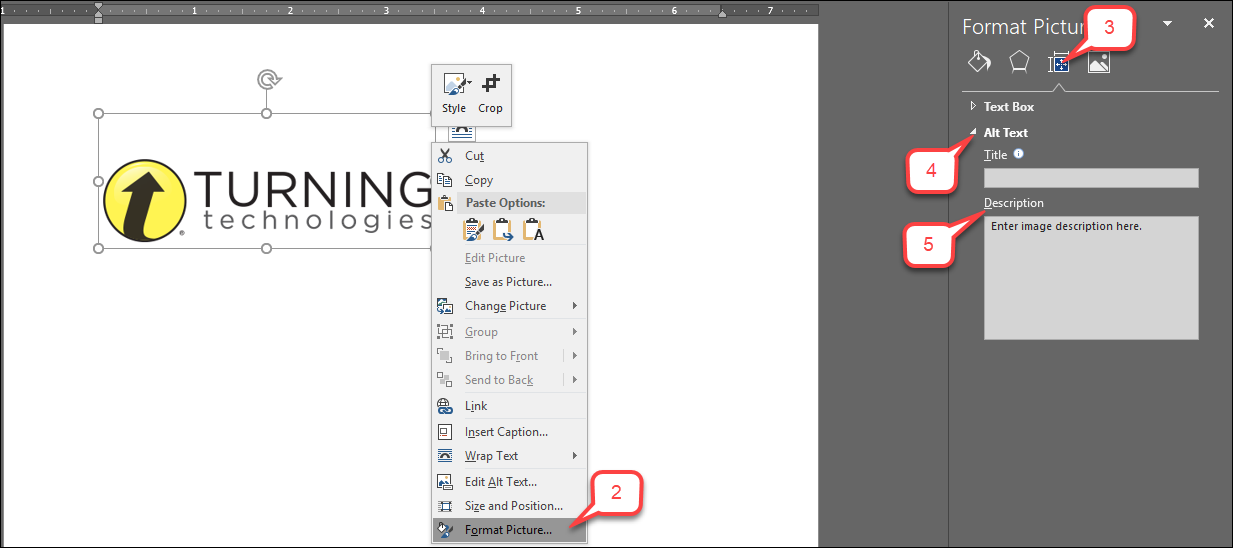
Add Alternative Text to Images
When using images (pictures, clip art, or screenshots), you need to add alternative text. This allows users to read the text describing an image.
- Right-click an image.
- Select Format Picture.
- Then select Layout & Properties.
- Select Alt Text.
- Type a brief description of the image.
Tip: Include the most important information in the first line and be as concise as possible.
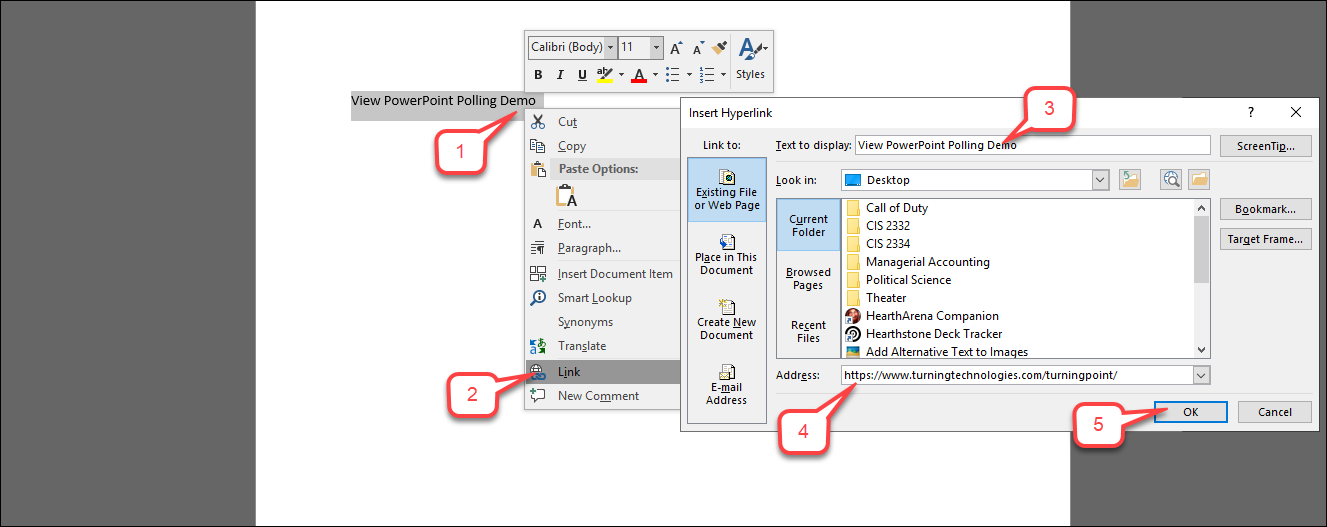
Use Meaningful Hyperlink Text
If you use the URL itself or Click Here texts as a hyperlink, users may not comprehend it. You need to provide hyperlink texts that show the full title of the destination page. For example, using University of Houston instead of http://www.uh.edu or Click Here.
- Select the text you want to add a hyperlink to and then right-click it.
- Select Link. The text you selected displays in the Insert Hyperlink dialog box.
- If necessary, change the hyperlink text.
- In the Address box, enter the destination address for the hyperlink.
- Press OK to save changes.
Font Style
Sans-Serif fonts are more readable especially for those who have low vision. The default font style in Word documents is Calibri. You also have other font options such as Arial, Verdana, Tahoma, Helvetica, and Georgia. Ensure that the font size is at least 11 points.
Font Color
Do not use color alone to make a distinction because those who are color blind or have low vision cannot benefit from the information. Make sure there is enough color contrast between the font colors and the background color. The default font color in a Word document is black with a white background color.
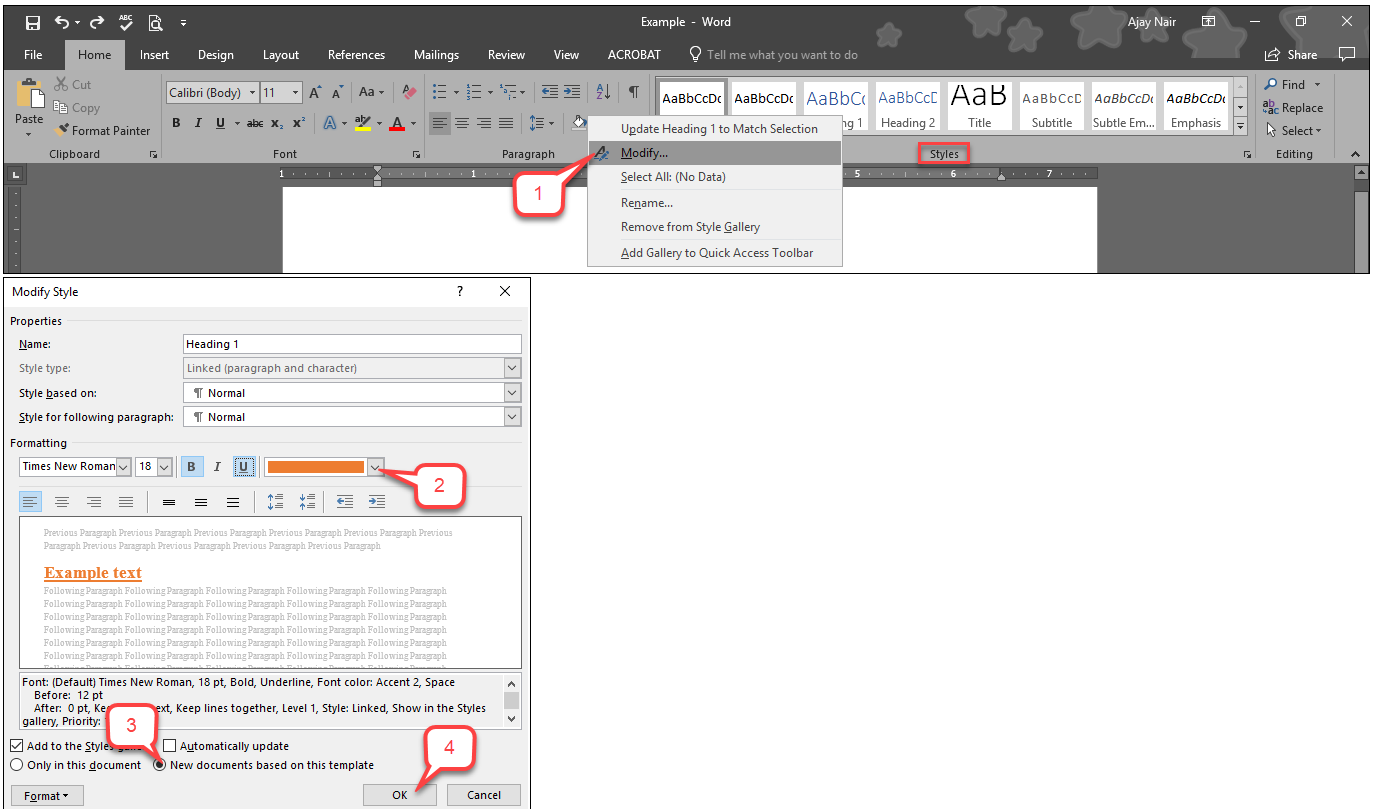
Note: The default style in Microsoft Word uses a light blue heading color that have insufficient color contrast. You can change those headings to a darker color. The following steps show you how to modify the color, font, and size of default headings.
- On the Styles ribbon, right click Heading 1 and choose Modify…
- In the Modify Style dialog box, you can change the colors, fonts, and sizes as you want.
- In the Modify Style window, select the New documents based on this template option at the bottom of the dialog box.
- Press OK to save the changes.
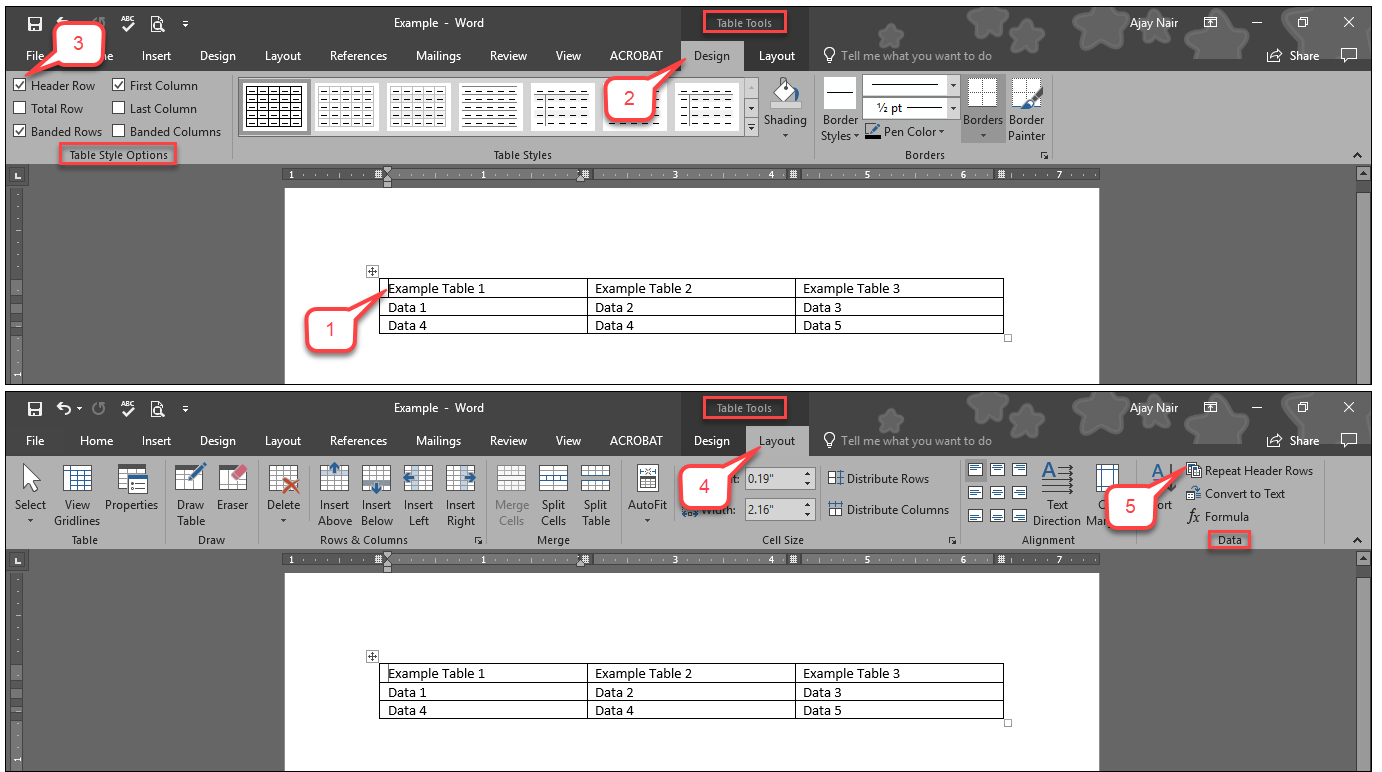
Use Table Headers
It is important for users to understand how the table information is laid out by using table headers. Please note that Microsoft Word only allows the top row of a table to be designated as a row heading. Ensure that tables do not contain split cells, merged cells, nested tables, or completely blank rows or columns because users read tables from left to right, top to bottom, and one cell at a time. If cells are split or merged, the reading order can be thrown off.
- Position the cursor in the top row of a table.
- Under Table Tools, select the Design tab.
- In the Table Style Options group, select the Header Row check box.
- Under Table Tools, select the Layout tab.
- In the Data group, select Repeat Header Rows.
Tip: You can test the reading order of a table by placing the cursor in the first cell of the tab and pressing the Tab key repeatedly to navigate through the table.
Use Accessibility Checker in Word
Microsoft Word has a built-in Accessibility Checker tool which finds accessibility issues and warnings, explains the reasons for them, and offers solutions for the issues. The following tutorial shows you how to use the Accessibility Checker for Word files on Windows, Mac, and Office 365.