- /
- /
- /
How to Share File or Folder with Others in OneDrive
After uploading files/folders to your OneDrive, you can share them with a person or a class group easily.
- Login to your Office 365. See Tutorial.
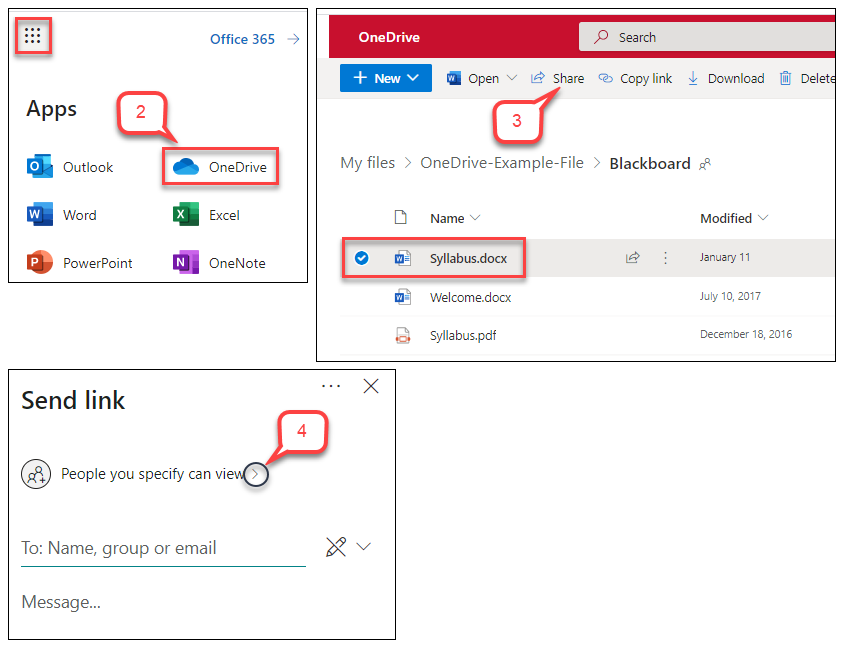
- At the top of the page, select the Office 365 app launcher, and then select OneDrive.
- Select the file/folder you want to share, and click Share.
- In the “Send Link” window, the default sharing is “People you can specify can view.” Click the “<“ right-arrow to display more options.
- In “Link Settings” window, you can see options and the “Specific people” option is selected. In this tutorial, we will share a file with specific people.
- Anyone with the link: Anyone can access the file/folder without login Office 365
- People in UH: People in UH can access the file/folder by login Office 365
- People with existing access
- Specific People
- In “Other settings” section, select if you want people to edit or download the shared file. Click Apply.
- In the “Send Link” window > “To” field, type a specific name or you class group you want to share the file with. As you type each name or group, suggestions appear that match your contacts.
- Type any message, and click Send.
Note: The person will receive an email notification with a link. S/he can access the shared file by clicking the link and login the Office 365. You will also receive the same email notification.