- /
- /
- /
How to Upload Video File to Classic Stream & Share the Video Link
The most common video file formats are supported by Microsoft Stream are .mp4, .avi, .wmv, .mov, and FLV. However, currently, only MP4 and WMV files are supported for automatic transcription.
- Login your UH Office 365. See How to log into UH Office 365 tutorial.
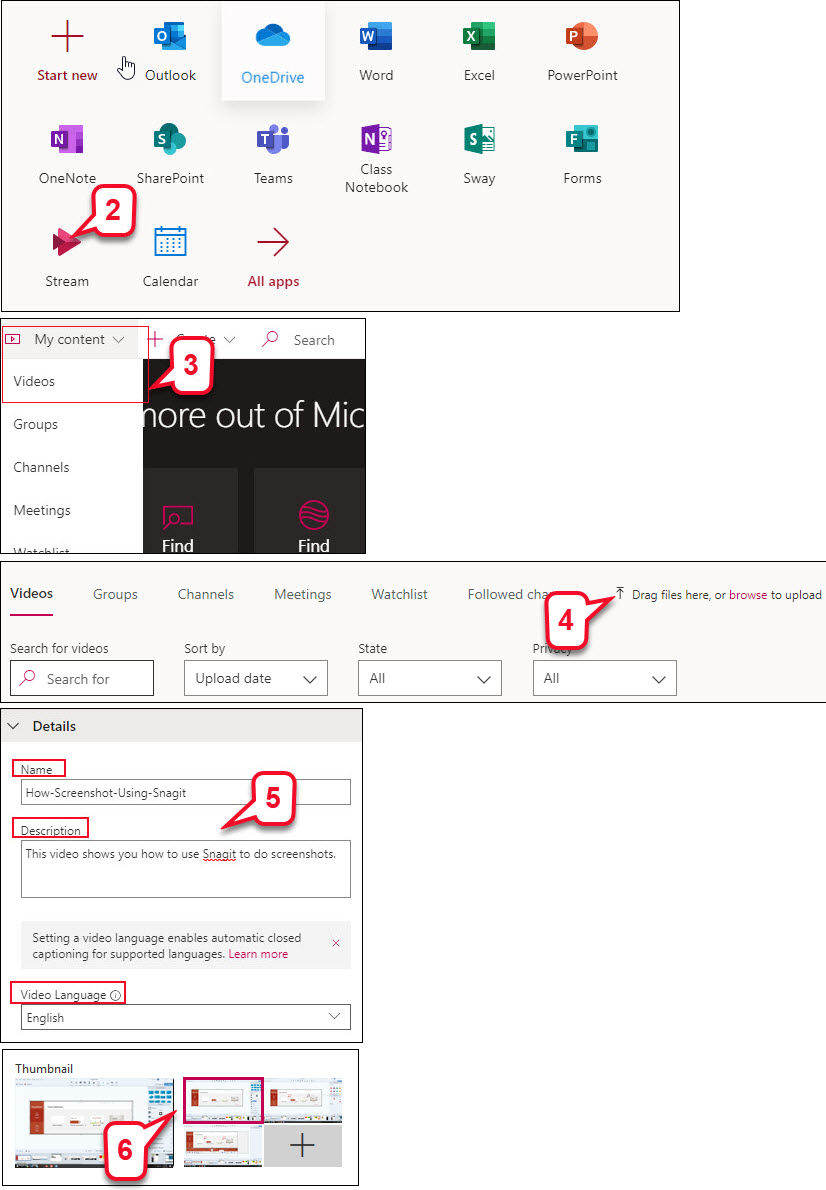
- Select Stream from the app launcher.
Note: If you do not see the “Stream” icon, click All apps. - Click My content tab and select Videos from the drop-down menu.
- In the “Videos” tab, drag a video file there or select browse to upload.
- Once the video is uploaded, in “Details” section, enter name and description for the video, and select a video language spoken in the video that will enable a Closed Caption.
- When the frames from the video are generated under “Thumbnails,” select one frame to represent your video.
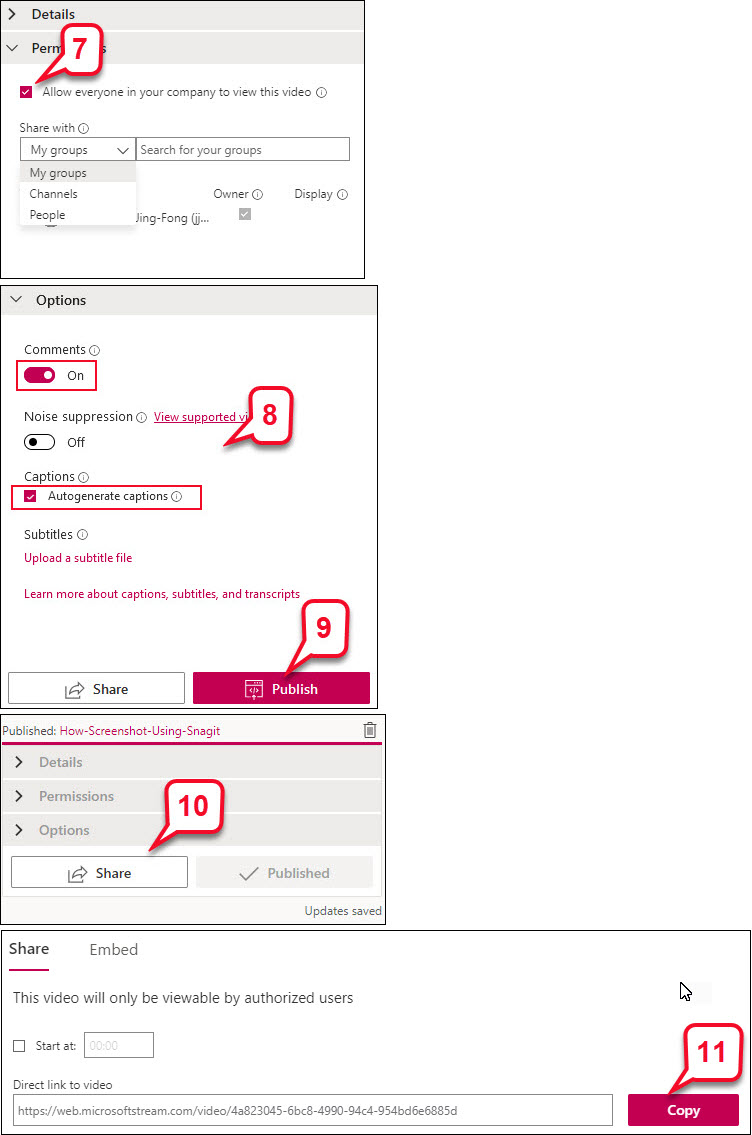
- In “Permission” section, the box “Allow everyone in your company to view this video” is checked. When not checked, your video will only be viewed by those people and group you have make viewers.
Note: For more information about permissions, see Video permissions. - In “Options” section, the control of comments and captions are turned on, and the control of noise suppression is off.
Note: To make sure your video are accessible to all students, the captions should be ON. - Once you have set up your video, select Publish.
- After publishing the video, select Share.
- Select Copy button and share this direct video link in Blackboard.
Note: If you want to embed your video, select Embed tab and copy embed code.