- /
- /
- /
How to Generate Automatic Captions in Microsoft Stream Video
You want to add captions into your videos to make your content accessible for your students. Microsoft Stream can use speech recognition technology to automatically create captions for your videos. Currently, only MP4 and WMV files are supported for automatic transcription.
- Sign into your UH Office 365. See How to log into UH Office 365 tutorial.
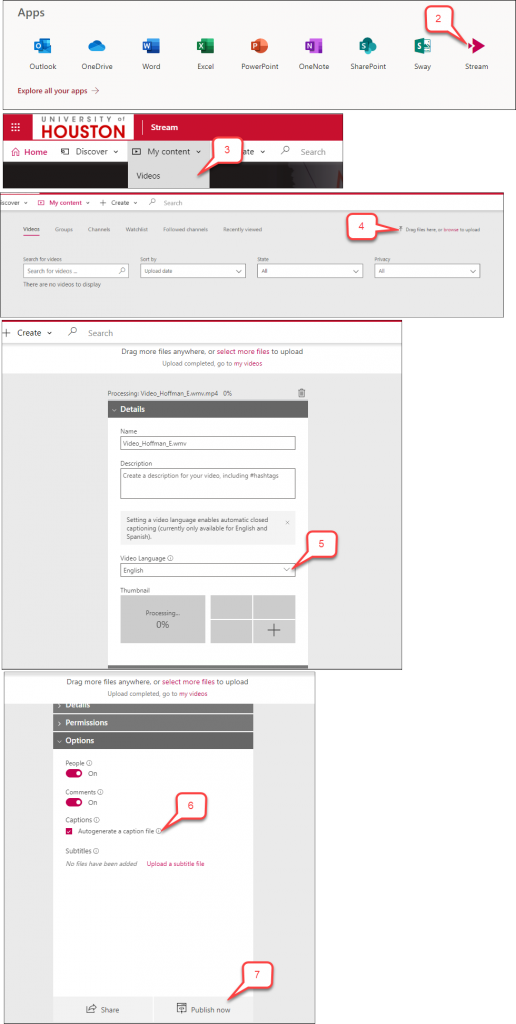
- Select Stream.
- Note: If you do not see the Stream icon, click Explore all of your apps.
- Click My content tab and select Videos from the drop-down menu.
- In the “Videos” tab, drag a video file there or select browse to upload.
- In the “Details” tab, select English from the “Video Language” menu.
- In the “Options” tab, select Autogenerate a caption file.
- Select Publish now. Microsoft Stream will automatically begin generating captions.
- Note: The time to generate the automatic caption depends on the length of your video
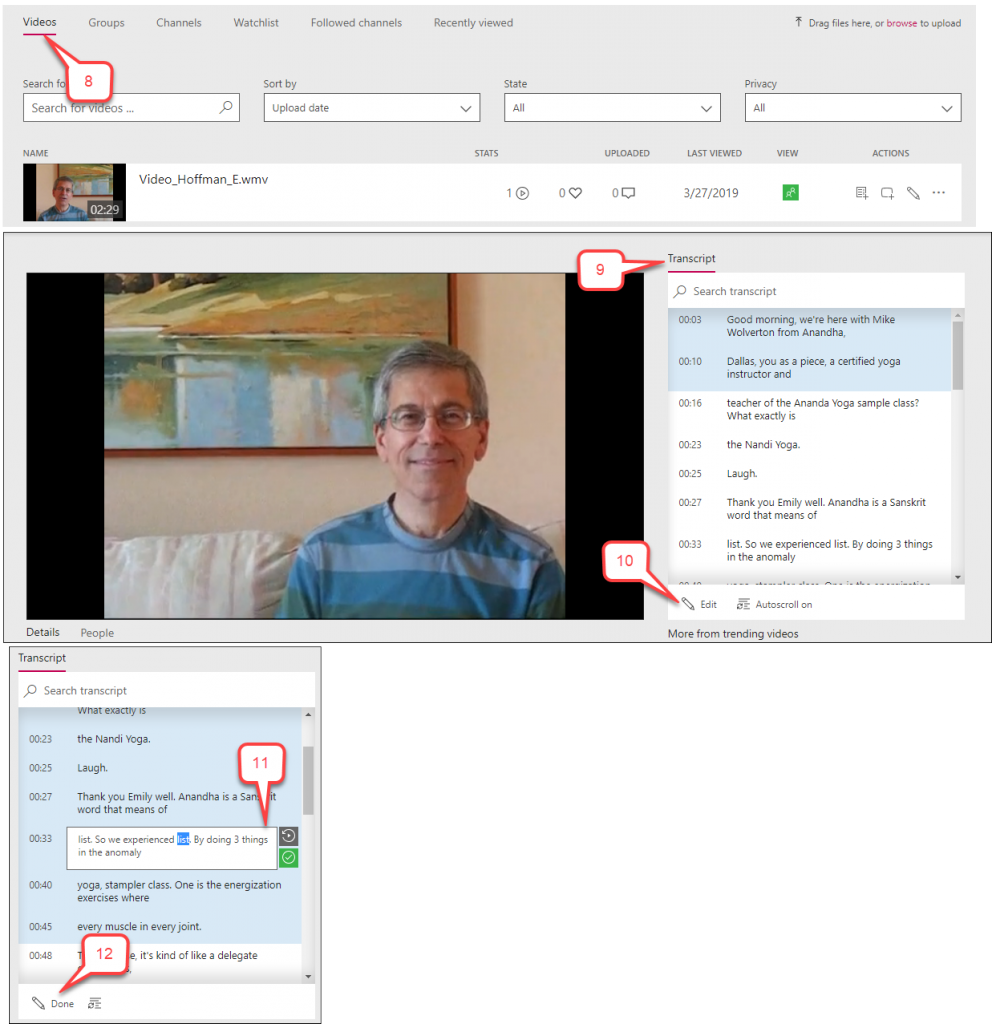
- When the video is published, the video is shown in My content > Videos.
- Click the published video. The automatic captions and time-codes are shown under the “Transcript” window. Review the automatic captions.
- Note: Automatic captions might misrepresent the spoken content due to mispronunciations, accents, dialects, or background noise. Therefore, it is important to check the automatic captions and edit any words that haven’t transcribed correctly
- If you need to edit the automatic captions, click Edit in the “Transcripts” window.
- When you are in Edit mode, you can select one segment at a time.
- Note: There are two buttons that appear next to the active segment. The gray button allows you to easily replay the current segment. The green button allows you to deselect the current segment when you are finished editing.
- Once you have completed the edits, select Done to exit Edit mode.