- /
- /
- /
How to Schedule a Teams Live Event
Read First: If the total number of your students is less than 300, we strongly recommend you to use the Teams live meeting. How to Attend and Record a Live TEAMS Meeting
Click here to view full-screen video
If you are the organizer of a live event, you can schedule it in Teams the same way you schedule a regular Teams meeting. This process will add the live event to you and your event group’s calendars. If you don’t have any presenter joining the live event, you will be the organizer and the presenter.
- In Teams, select Calendar
- Click the drop-down arrow next to +New meeting. Then, select Live event.
- In the “New live event” screen, add the meeting title, date and time information, and other details.
- In the “Invite people to your event group” box, add the names of the people who will present the event. If you are the only presenter, skip the box. Then, you will be the organizer and the presenter for this event.
Note: There are different roles in the live event. See this Event group roles for each role and its responsibilities. - Select Next.
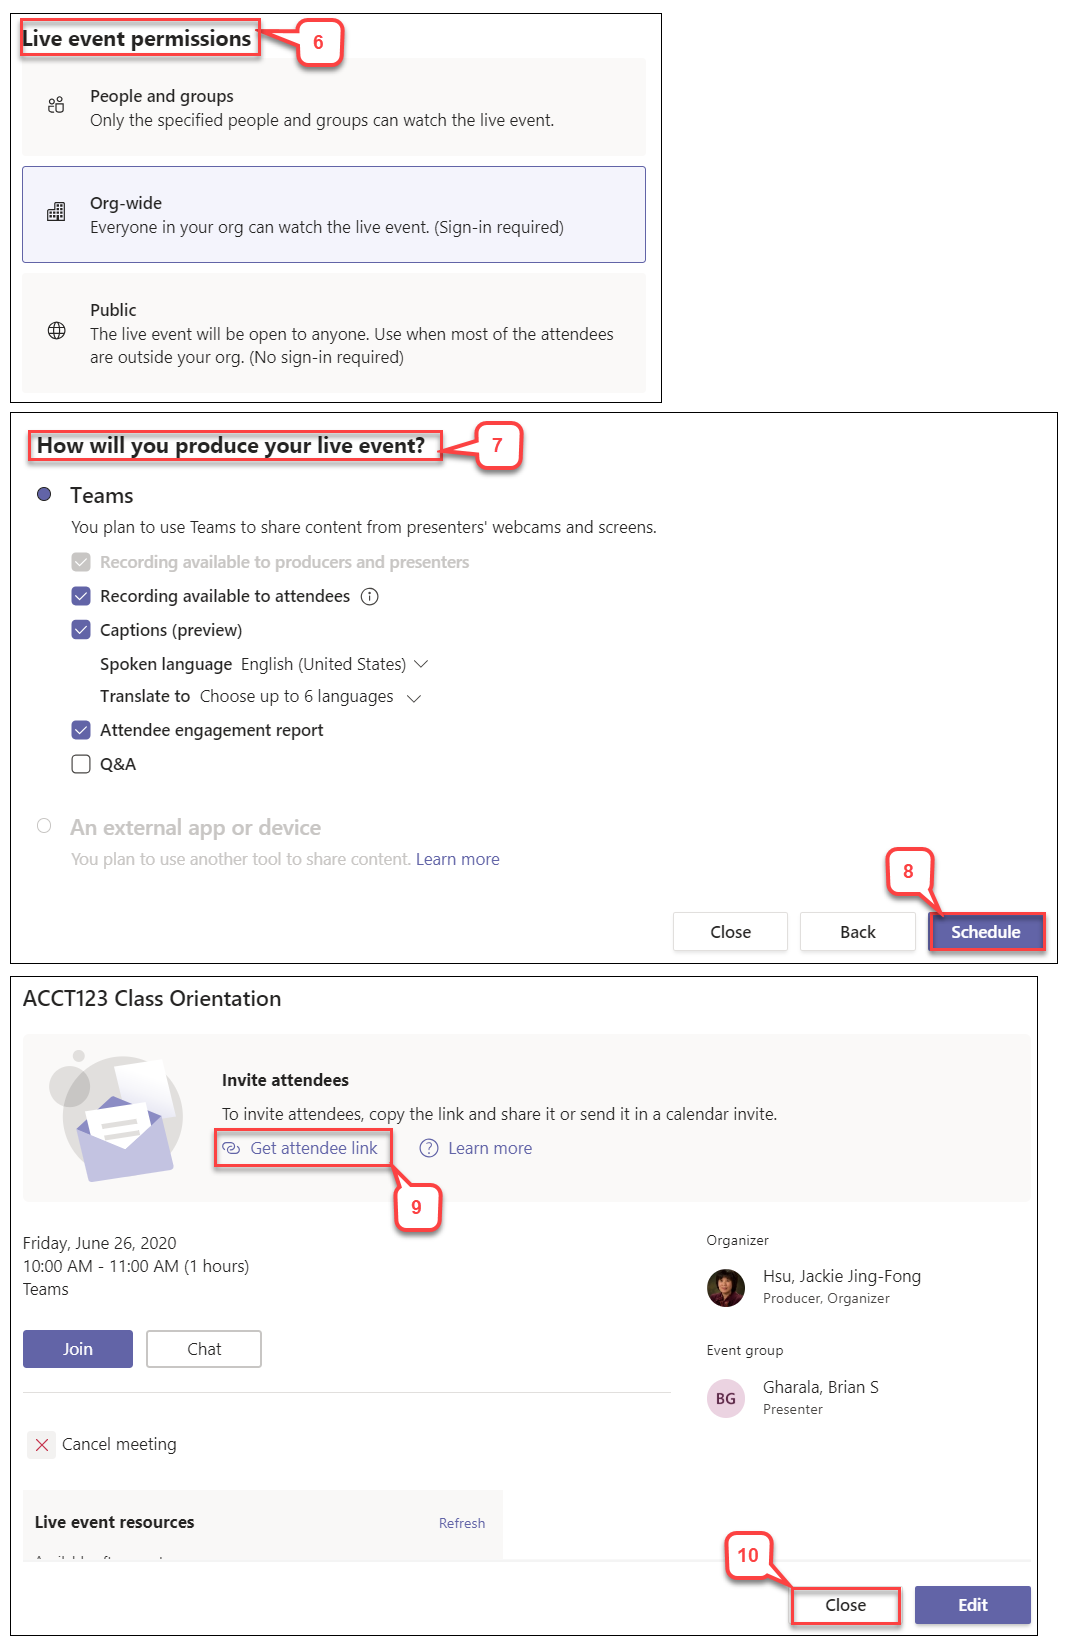
- Under the “Live event permissions” section, select who can attend your live event.
- Under the “How do you plan to produce your event” section, select the live event setting you want.
Note: Select Q&A if you want students to interact with the producer and presenter. - Click Schedule.
- Select Get Attendee link to copy the live event link. Then, share it with students in Blackboard announcement, Email, or Teams channel.
Note: The live event organizer needs to invite the attendees. Your students will be able to watch the event in Teams—desktop (Windows or Mac), web, or mobile. If you don’t have any presenter joining the live event, you will be the organizer and the presenter. - Select Close to return to Calendar.
Note: Once the event is scheduled, go to Teams Calendar to make any change. Don’t edit this event in Outlook.