- /
- /
- /
How to Share File or Folder in UH SharePoint Server
After uploading files/folders to the UH SharePoint server, you can share them with a person or you class group.
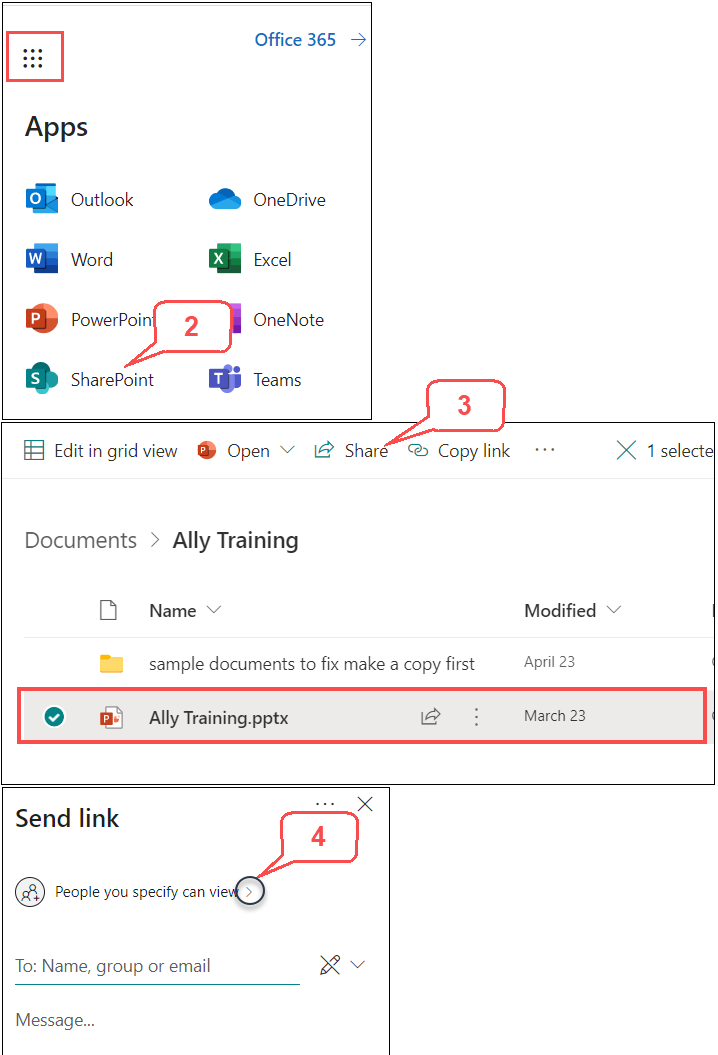
- Login to your Office 365. See Tutorial.
- At the top of the page, select the Office 365 app launcher, and then select SharePoint.
- Select the file/folder you want to share, and click Share.
- In “Send Link” window, the default sharing is “People you can specify can view.” Click the “<“ right-arrow to display more options.
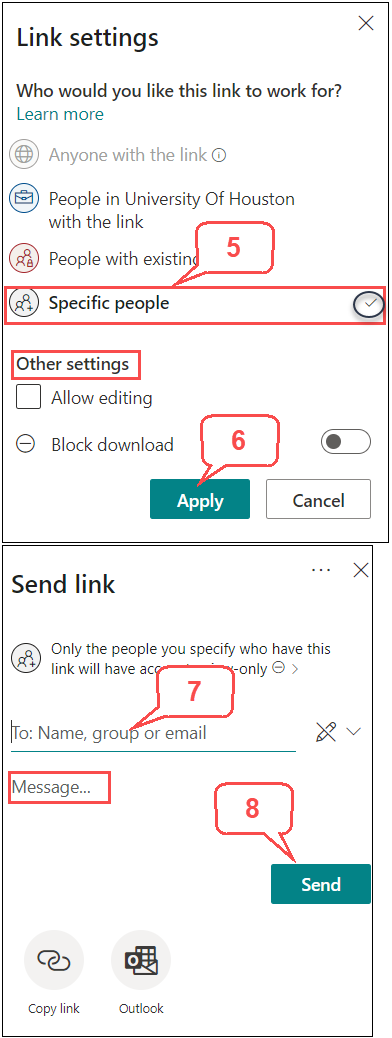
- In “Link Settings” window, you can see options and the “Specific people” option is selected. In this tutorial, we will share a file with specific people.
- Anyone with the link: Anyone can access the file/folder without login Office 365
- People in UH: People in UH can access the file/folder by login Office 365
- People with existing access
- Specific People
- In “Other settings” section, select if you want people to edit or download the shared file. Click Apply.
- In the “Send Link” window > “To” field, type a specific name or you class group you want to share the file with. As you type each name or group, suggestions appear that match your contacts.
- Type any message, and click Send.
Note: People will receive an email notification with a link. They can access the shared file by clicking the link. Use this “Specific people” to share with people inside or outside your organization, and when you want to prevent the link from being forwarded to others beyond whom you specify.