- /
- /
- /
How to Use Request Files in OneDrive for Large-File Submission
The default quota for Blackboard courses is 1500 MB. If students submit large assignment files to Blackboard, your course will hit the quota quickly.
The alternative way for students to submit a large file is to create a “Request files” folder in the instructor’s OneDrive and share this folder link in the Blackboard. When students click this folder link, they can upload assignment files to the instructor’s OneDrive, and the instructor will receive students’ submission confirmation in email.
Note: Instructors can set an expiration date on the “Request files” folder. Students only can submit their files. But they can’t see this folder.
Part I: Creating Request Files Folder (Instructors)
- Login to UH Office 365. See tutorial.
- At the top of the page, select the Office 365 app launcher, and then select OneDrive.
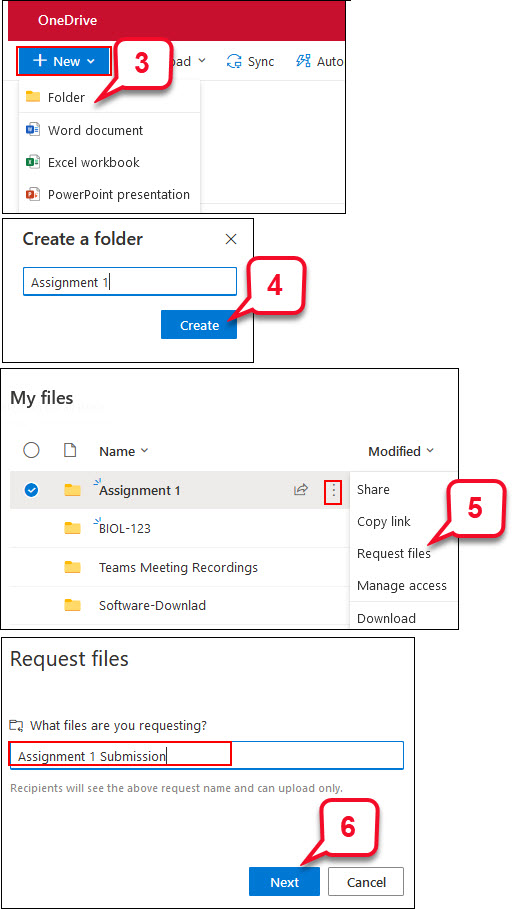
- Click New. Then Select Folder.
- Enter a folder name. Then click Create.
- Click 3 dots next to the assignment folder. Then select Request file.
- In “Request files,” enter a name for the request. Then click Next.
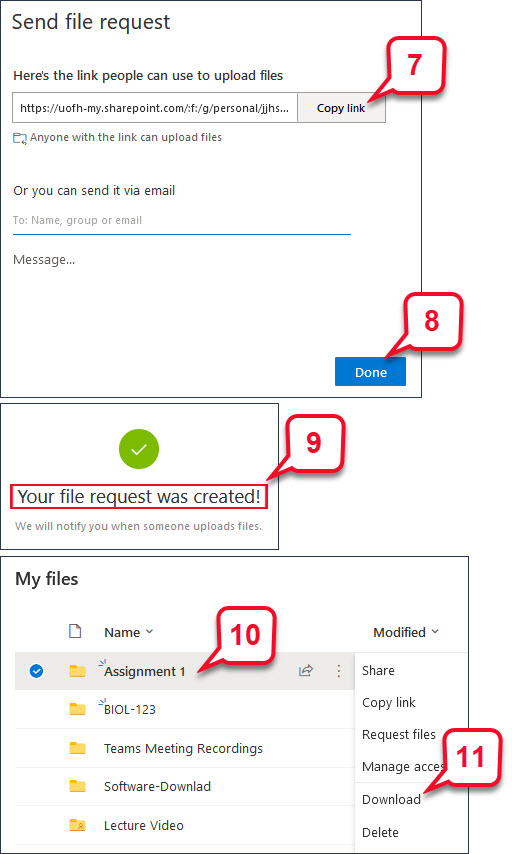
Note: Students will see the request name and can upload only. They can’t see other students’ submissions. - Select Copy link if you want to paste this link into your Blackboard course content.
Note: You can also send this link via email. - Click Done
- A message “Your file request was created” is shown.
Note: The instructor will get notified in email when students upload files. - To access or view students’ submitted files, click the Assignment 1 folder.
- To download students’ submitted files, click the 3 dots and select Download.
Note: To enter grades in Blackboard you will need to create a column and manually enter the grades.
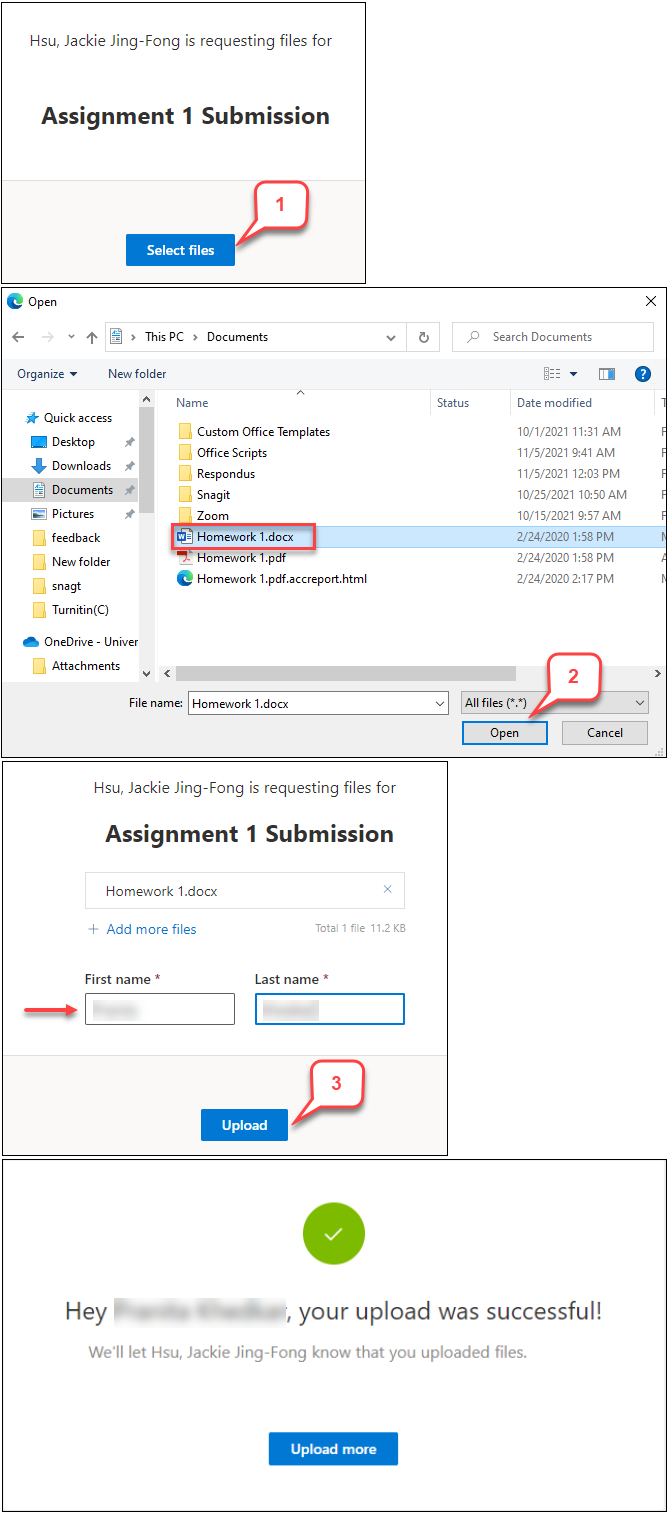
Part II: Submitting Assignment Files (Students)
- After clicking the “Request Files folder” link, click Select files.
- Select file(s) you want to upload, click Open.
- Enter first and last names. Then, click Upload.
- After the submission, the student will receive a confirmation message.