- /
- /
Fall 2021 Move Your Course Online Quickly
If you need to transition to online instruction, the tutorials below will show you how to request a Blackboard/Teams Course and how to post videos using Microsoft Stream. Blackboard is ideal for sharing content with your students. Teams is best used for synchronous meetings. Microsoft Stream can be used to post asynchronous videos. For more tutorials on Blackboard, Teams, and Stream, as well as all other supported technologies, please refer to our knowledgebase: https://www.instruction.uh.edu/knowledgebase/
Move Your Course Online Quick Tutorials
- How to Request a Blackboard/Teams Class
- How to Upload a Video File to Classic Stream & Share the Video Link
Tutorial 1: How to Request a Blackboard/Teams Class
-
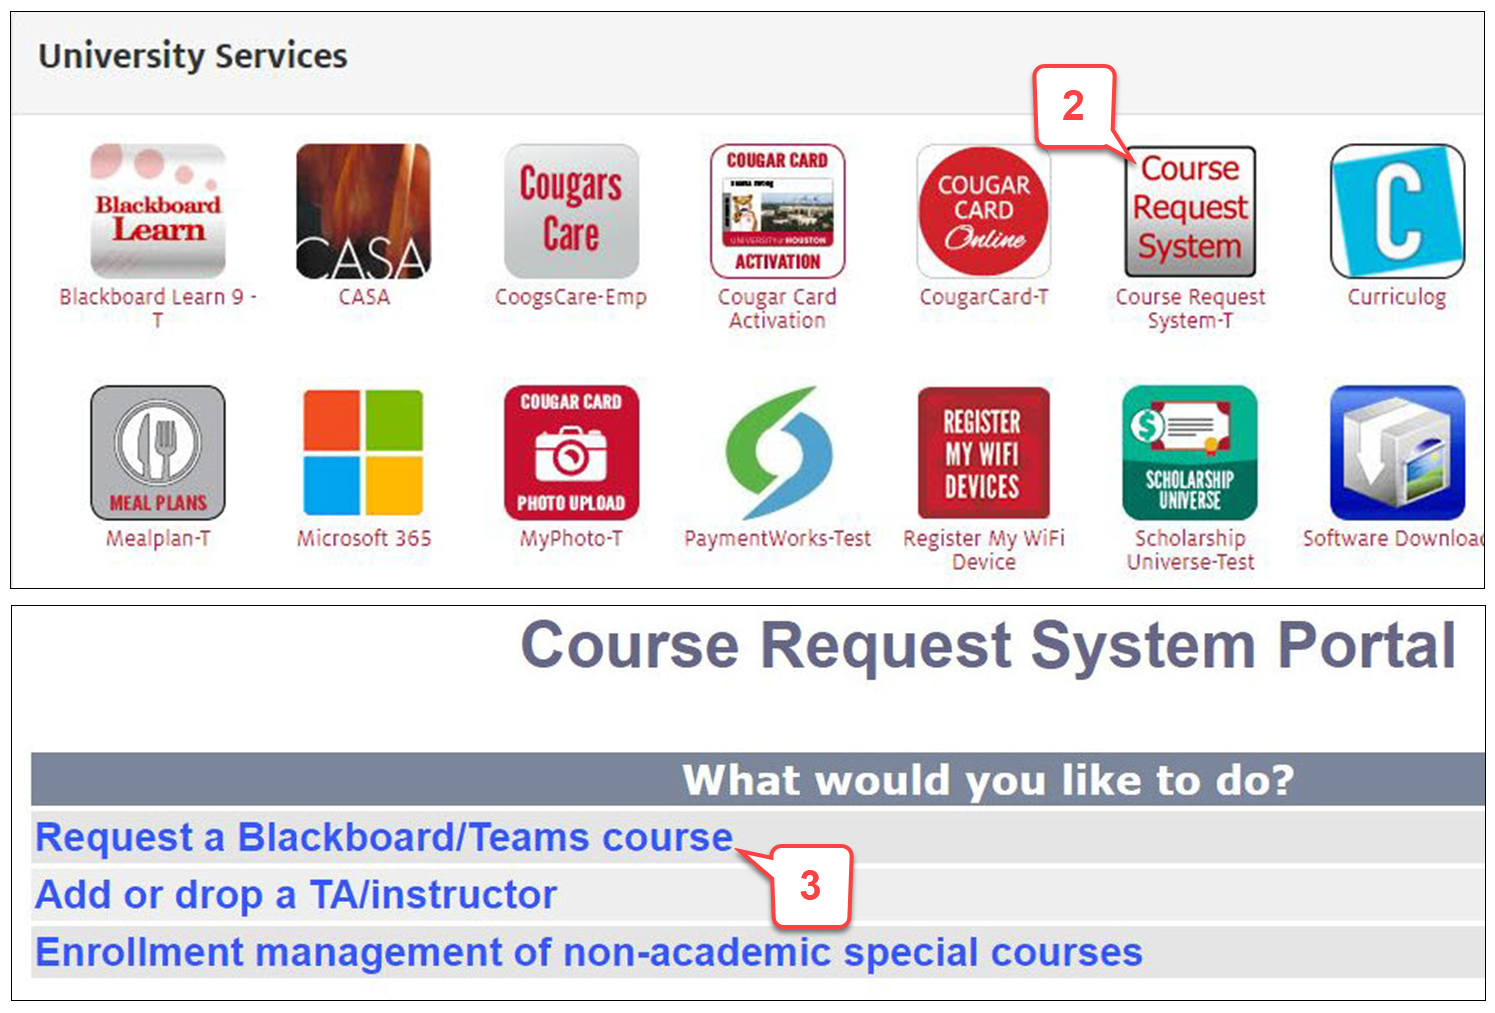
- Login to http://accessuh.uh.edu
- Click the Course Request System icon.
- Select Request a Blackboard/Teams course.
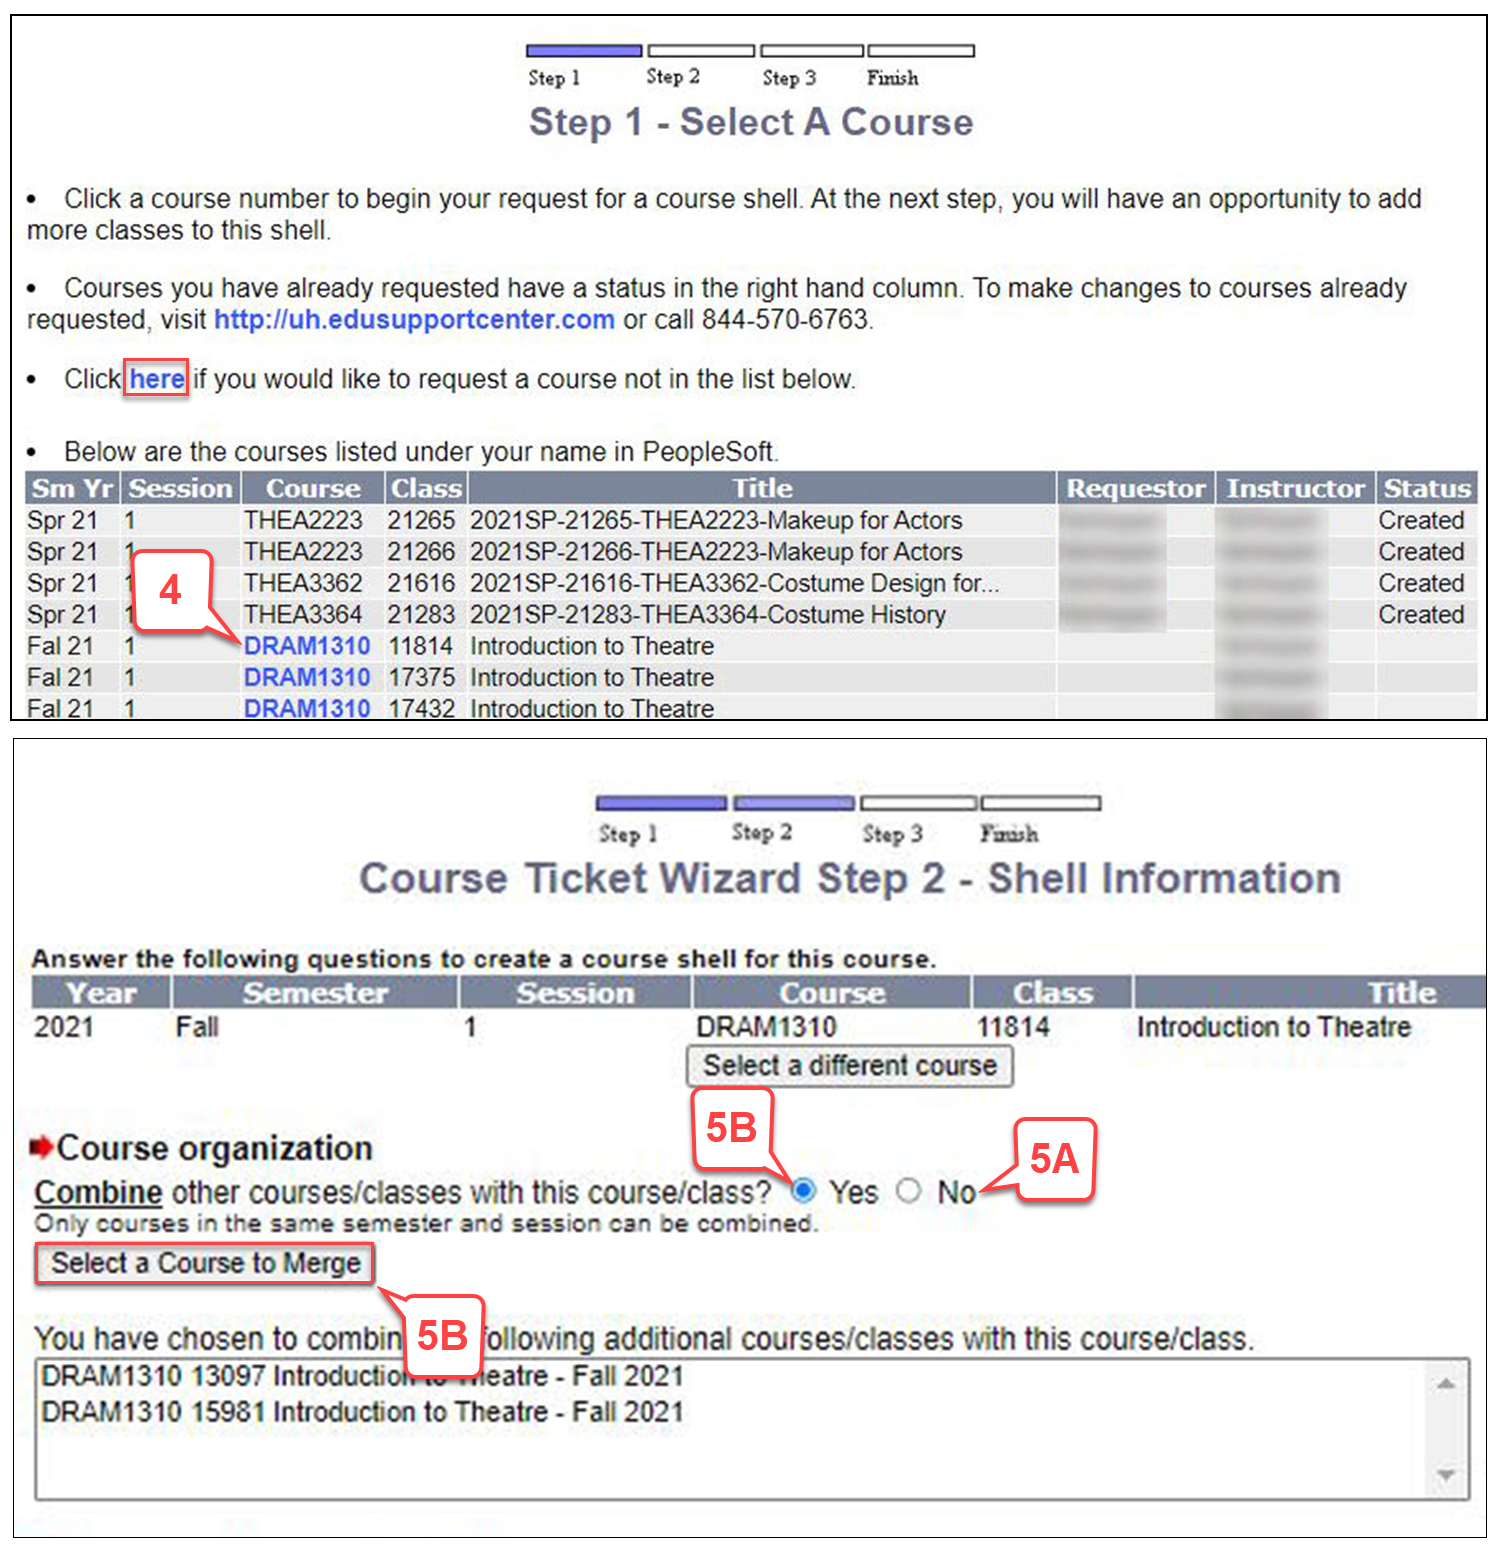
- The courses listed are assigned to you according to Peoplsoft. Click on the course ID.
Note: If you do not see the course in the list, it means Peoplesoft hasn’t attached your name to the course yet. But you can still request any course by clicking the word “here” and search for it. - In the “Course organization > Combine” section,
A) Click No for a single course
B) Click Yes to combine the course with another section. Then click Select a Course to Merge button and find your other course section.
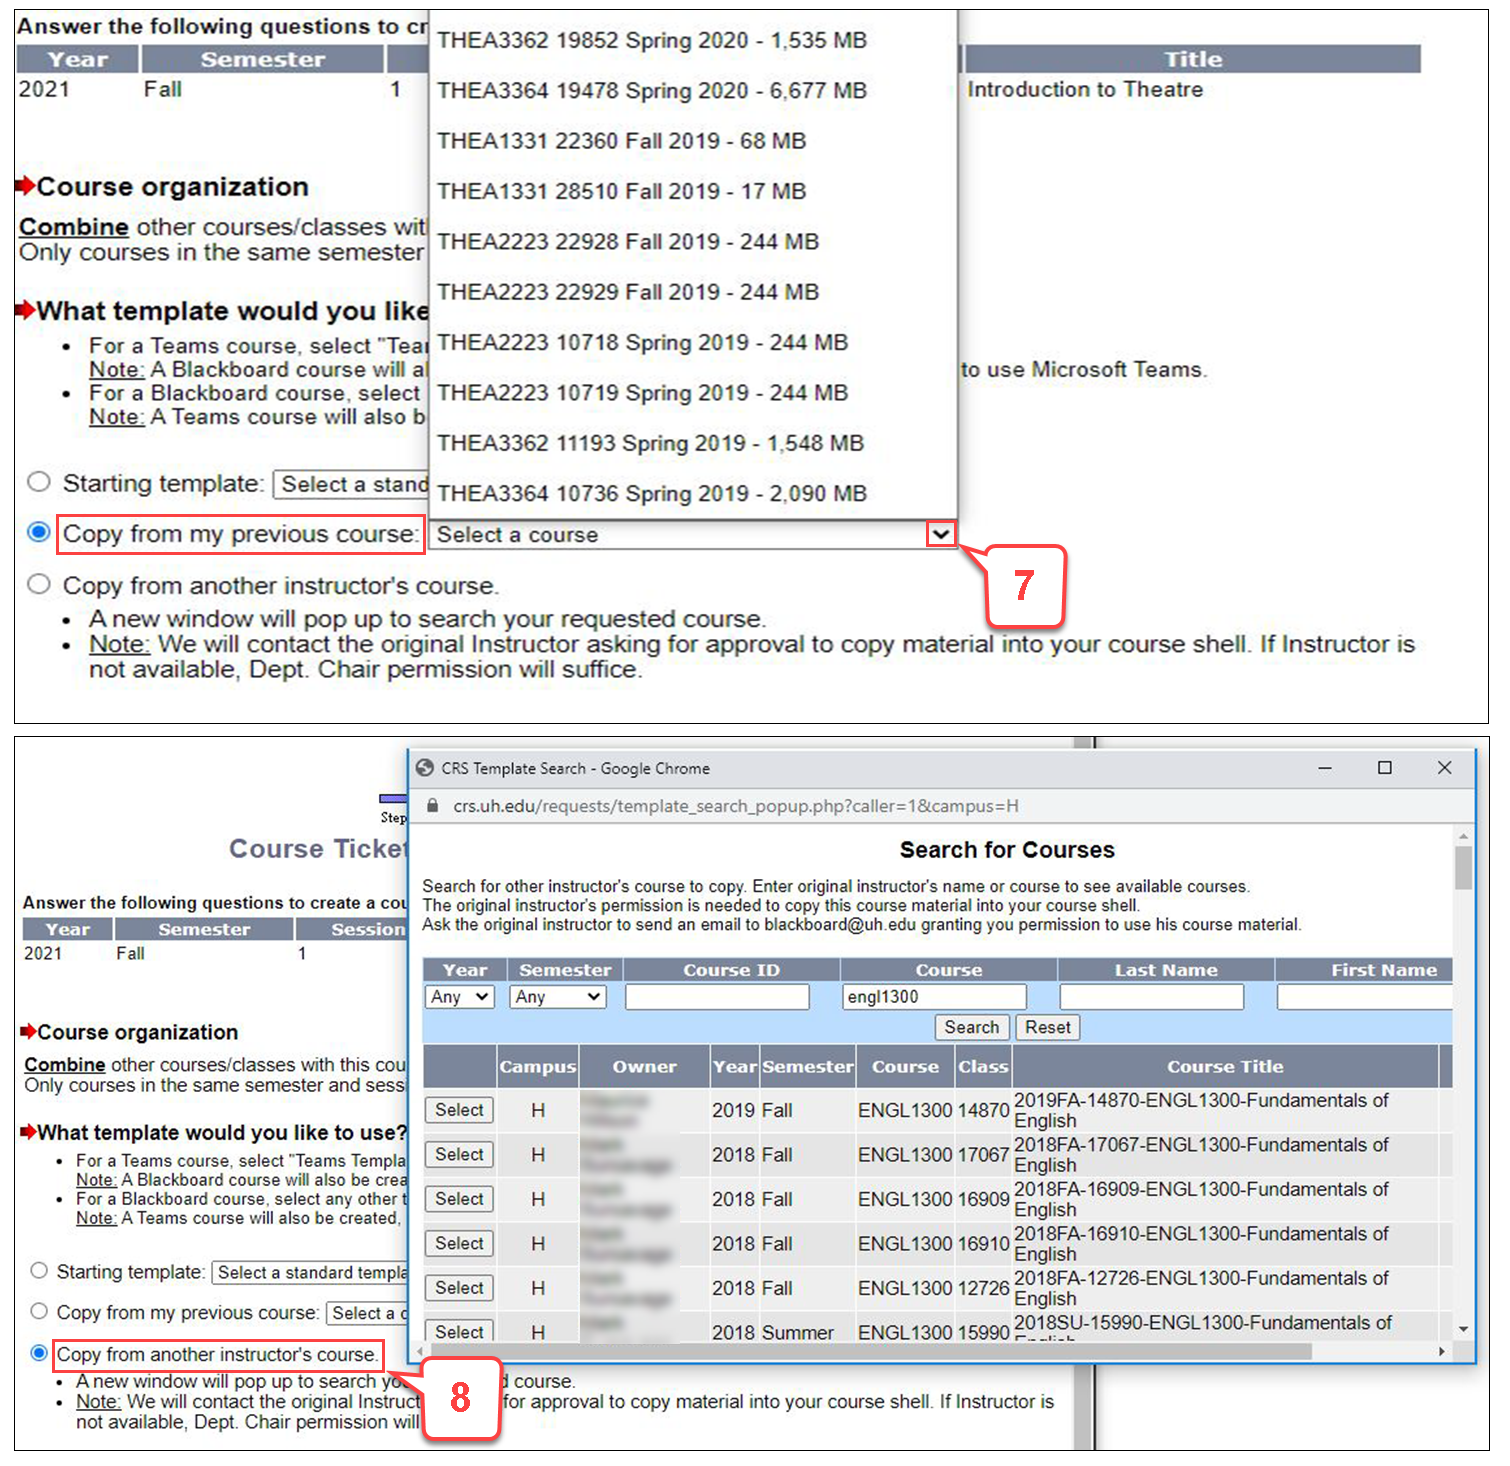
Warning: If you request to combine the course sections into one Blackboard course, it also will combine them in one Teams class automatically. If you want to have the individual Teams class for each section, send your request to blackboard@uh.edu. - In the “What template would you like to use?” section, you can choose a starting template (a blank course,) copy from a previous course, or copy from another instructor’s course.
If selecting the Starting template radio button, select a template from the drop down list.
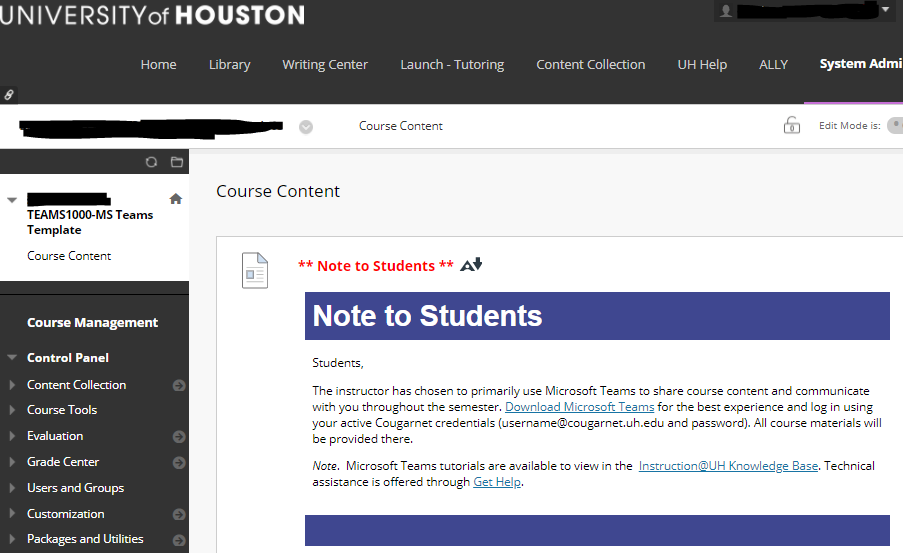
A) If you JUST need a Teams course, select “Teams Template.”
Note: A Blackboard course will also be created with a message redirecting students to use Microsoft Teams instead. (Below is what students will see.)
B) If you need a Blackboard course, select any other template.
Note: A Teams course will also be created. But, you need to activate it manually.
-
- If selecting Copy from a previous semester radio button, select the Blackboard course you want to copy from the drop-down list.
Note: If you have any customization you’d like done to your class team, send your request to Andy Moon, ajmoon2@central.uh.edu - If selecting Copy from another instructor’s course radio button, a new window will pop up, so you can select available Blackboard course.
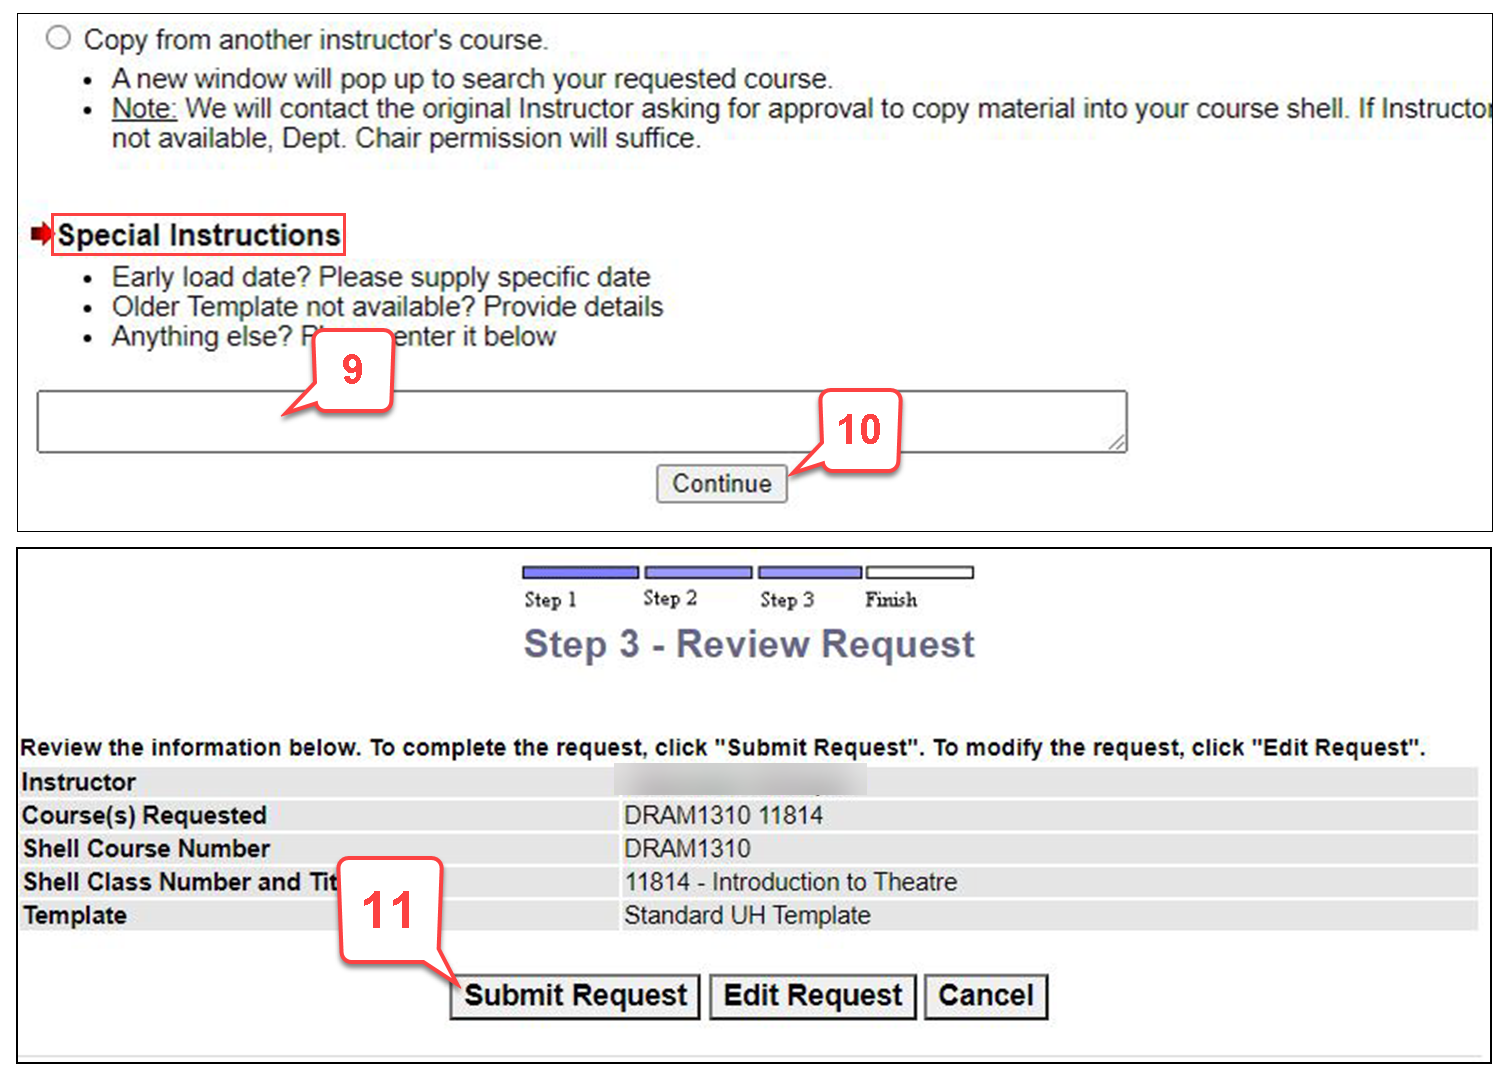
Note: We will contact the original Instructor asking for approval to copy material into your course shell. If Instructor is not available, Dept. Chair permission will suffice. - In the “Special Instructions” field, enter any additional information as necessary, e.g. load students early, make the course available before the first day of the semester, etc. Please enter a specific date if you want students loaded early.
Note: By default, students will be loaded 5-7 days before the start of the semester. After students are loaded, they can access your course. If your course is not ready, you can make the course not available. See the tutorial. - Click Continue button.
- On the Review Request screen, review the information and click Submit Request button. You will immediately receive an email that your request was received, and another email within 48 hours that the course is ready in Blackboard.
Note: The subject line of both emails will begin with, “UH Blackboard Communication,” and will be sent from blackboard@uh.edu.
- If selecting Copy from a previous semester radio button, select the Blackboard course you want to copy from the drop-down list.

Go Back to Top
Tutorial 2: How to Upload a Video File to Classic Stream & Share the Video Link
The most common video file formats supported by Microsoft Stream are .mp4, .avi, .wmv, .mov, and FLV. However, currently, only MP4 and WMV files are supported for automatic transcription.
-
-
- Login your UH Office 365. See How to log into UH Office 365 tutorial.
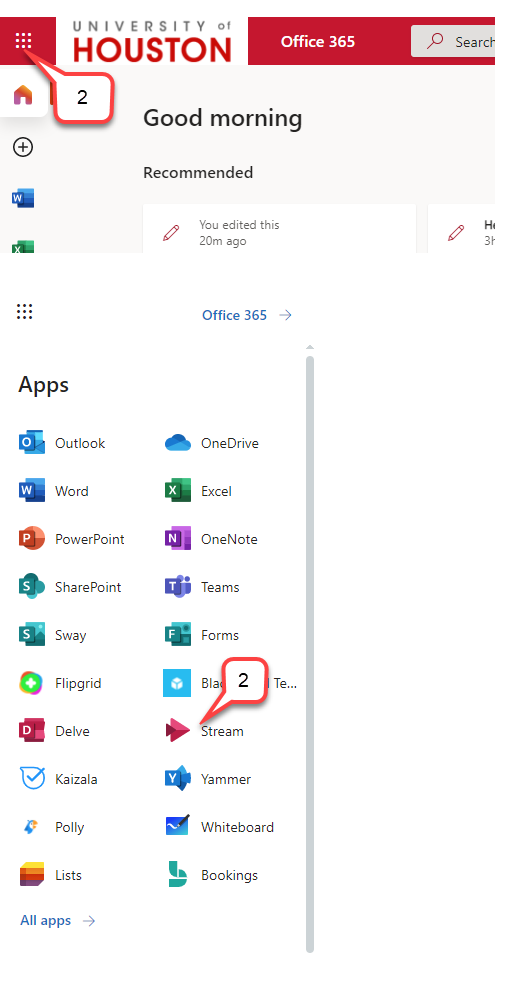
- Select Stream from the app launcher.
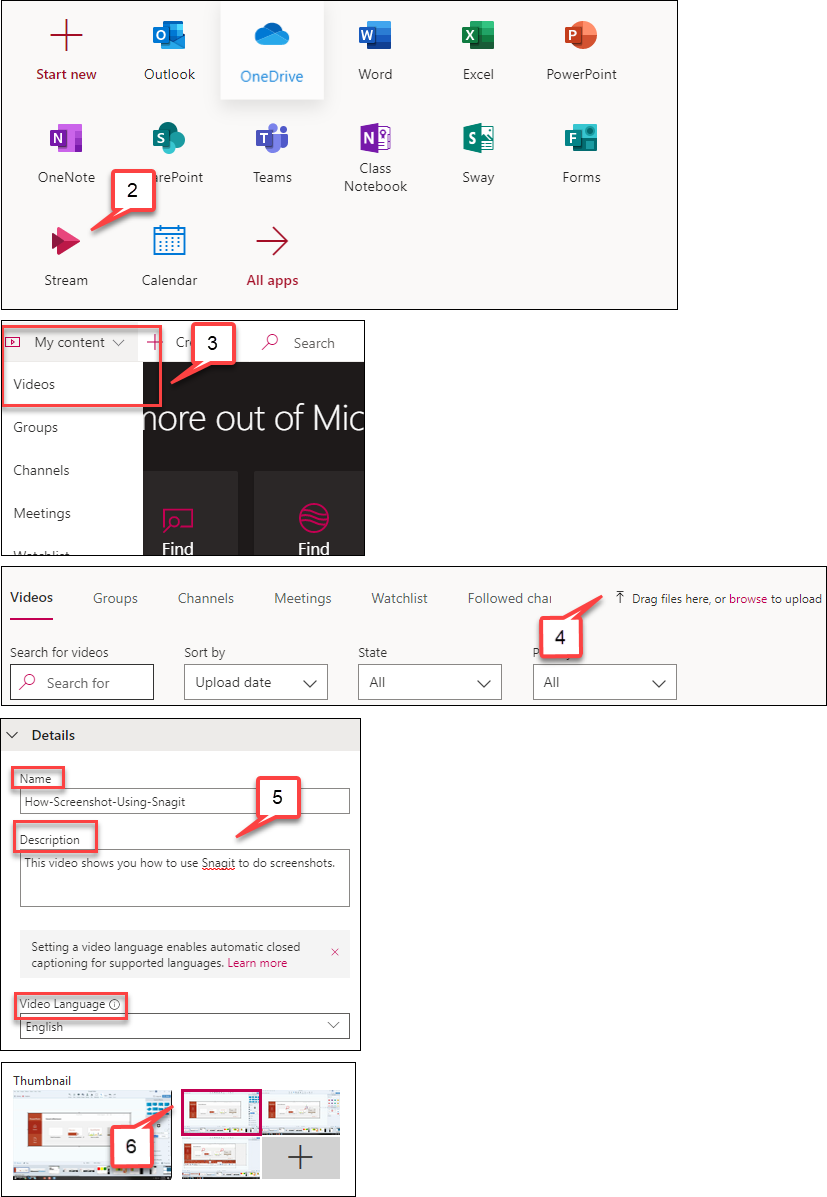
Note: If you do not see the “Stream” icon, click All apps. - Click My content tab and select Videos from the drop-down menu.
- In the “Videos” tab, drag a video file there or select browse to upload.
- Once the video is uploaded, in the “Details” section, enter name and description for the video, and select a video language spoken in the video that will enable Closed Captioning.
- When the frames from the video are generated under “Thumbnails,” select one frame to represent your video.
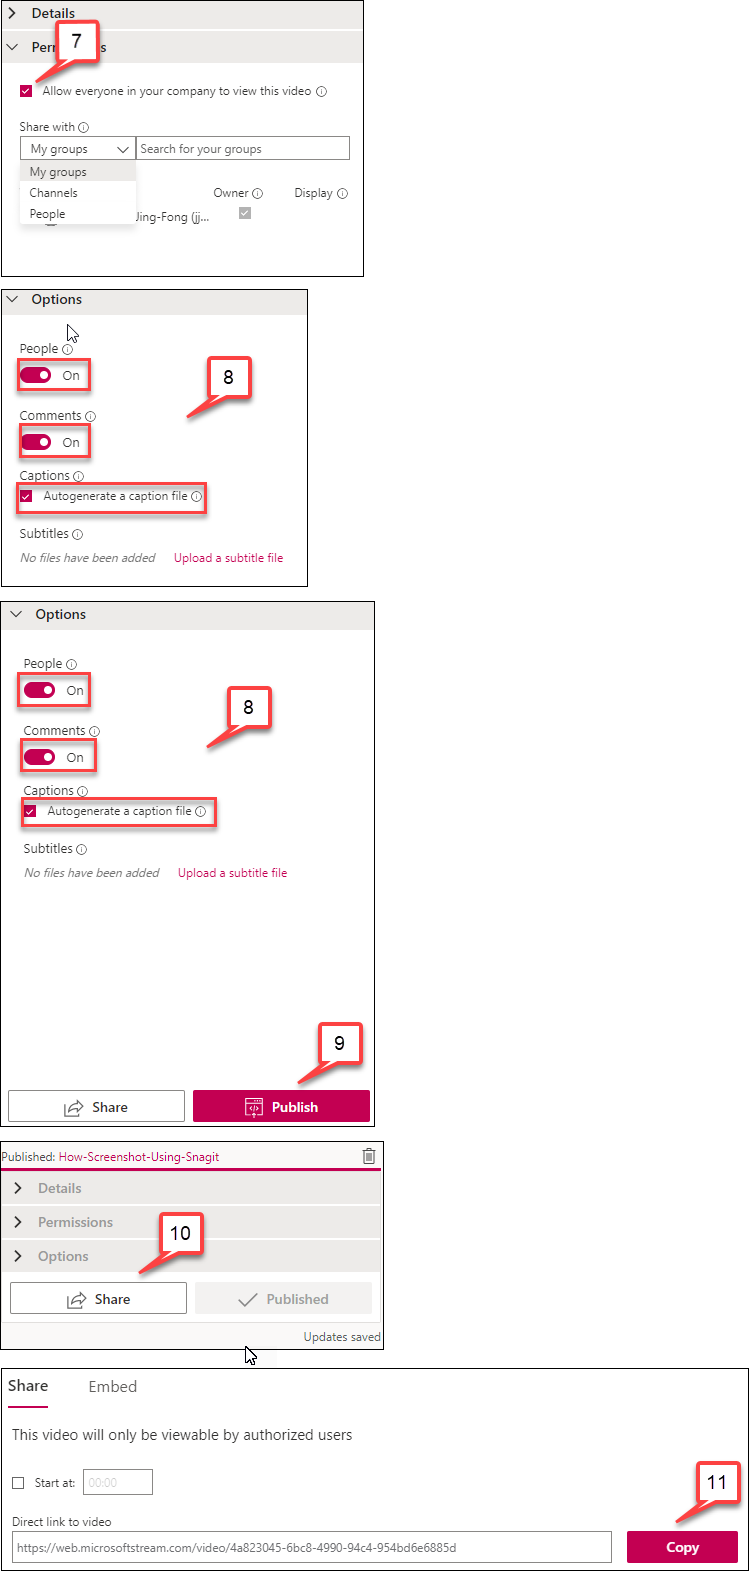
- In “Permission” section, the box “Allow everyone in your company to view this video” is checked. When not checked, your video will only be viewed by those people and group you make viewers.
Note: For more information about permissions, see Video permissions. - In the “Options” section, the control of people, comments, and captions are turned on. To make sure your video is accessible to all students, the captions should be ON.
Note: When a video has a caption set, students can click the CC button on the player while watching a video to show the captions under the video. - Once you have set up your video, select Publish.
- After publishing the video, select Share.
- Select Copy button and share this direct video link in Blackboard. How to Create a Web Link in Blackboard
Note: If you want to embed your video, select the Embed tab and copy the embed code.
-